What Factors Should I Consider When Hiring A Roofing And Repair Contractor? – Best Roofing Solution – Huntington

Roofing Contractor Huntington Beach CA is a significant decision that can have a lasting impact on the integrity and longevity of your home. Whether you’re in need of minor repairs or a full roof replacement, choosing the right contractor is crucial to ensuring quality workmanship, timely completion, and peace of mind.

With numerous contractors vying for your business, it’s essential to consider several key factors before making your decision. In this comprehensive guide, we’ll explore the essential factors to consider when hiring a roofing and repair contractor, empowering you to make an informed choice that meets your needs and exceeds your expectations.

1. Experience and Expertise

a. Years in Business

Consider the contractor’s experience in the roofing industry. A contractor with years of experience has likely encountered a wide range of roofing issues and possesses the knowledge and expertise to handle various repair projects effectively.

b. Specialization

Some contractors specialize in specific types of roofing materials or repair services. Determine whether the contractor has experience with the type of roofing system you have and the specific repairs you require. Specialization often translates to higher quality workmanship and better results.

2. Reputation and Reviews

a. Customer Reviews

Research the contractor’s reputation by reading online reviews and testimonials from past clients. Pay attention to feedback regarding the quality of work, professionalism, communication, and overall satisfaction with the contractor’s services.

b. Referrals

Ask friends, family, or neighbors for referrals to reputable roofing contractors they have worked with in the past. Personal recommendations can provide valuable insights and help you narrow down your options.

3. Licensing and Insurance

a. Contractor’s License

Verify that the contractor holds the necessary licenses and certifications required to perform roofing and repair work in your area. A valid license demonstrates that the contractor has met the minimum requirements and is authorized to operate legally.

b. Insurance Coverage

Ensure that the contractor carries adequate liability insurance and workers’ compensation coverage. Insurance protects you from liability in case of accidents or property damage during the course of the project.

4. Written Estimates and Contracts

a. Detailed Estimates

Request written estimates from multiple contractors outlining the scope of work, materials, labor costs, project timeline, and any additional fees or expenses. Compare the estimates carefully to ensure you understand the breakdown of costs and what is included in each proposal.

b. Contract Terms

Review the contract carefully before signing, ensuring that it includes all agreed-upon terms and conditions. Pay attention to important details such as payment schedules, warranties, dispute resolution procedures, and cancellation policies.

5. Warranties and Guarantees

a. Workmanship Warranty

Inquire about the contractor’s warranty or guarantee on the workmanship of the repairs. A reputable contractor should stand behind their work and offer a warranty that provides coverage for any defects or issues that arise after the project is completed.

b. Manufacturer Warranties

Ask about warranties on the roofing materials used in the repair project. Many manufacturers offer warranties on their products, providing additional protection and peace of mind in case of manufacturing defects or premature failure.

6. Communication and Responsiveness

a. Accessibility

Evaluate the contractor’s communication and responsiveness throughout the hiring process. A reliable contractor should be accessible and responsive to your inquiries, providing clear and timely communication at every stage of the project.

b. Project Updates

Discuss how the contractor will communicate project updates and progress reports. Regular updates ensure that you are informed about the status of the project and can address any concerns or issues promptly.
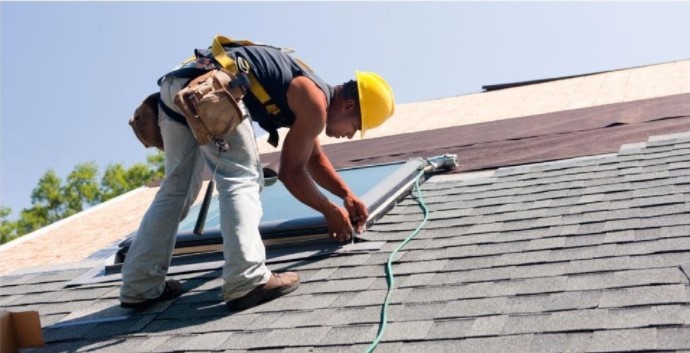
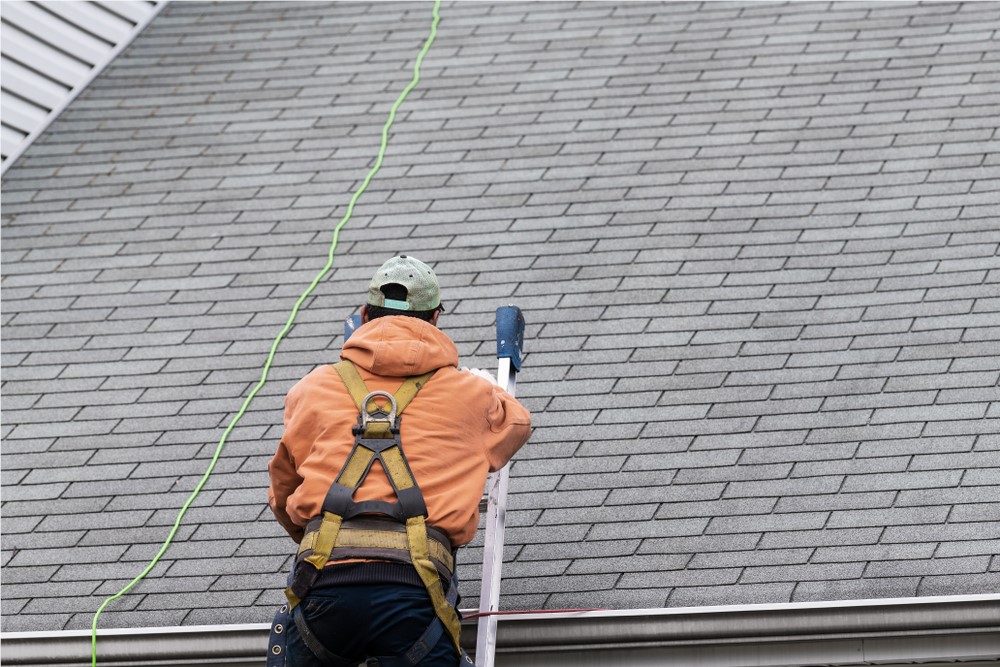
7. Safety Practices

a. Safety Protocols

Inquire about the contractor’s safety practices and protocols to ensure a safe working environment for their crew and your property. A reputable contractor should adhere to industry safety standards and take precautions to minimize the risk of accidents or injuries.

b. Training and Certification

Ask about the training and certification of the contractor’s crew members. Trained and certified technicians are better equipped to handle roofing repairs safely and effectively, reducing the likelihood of accidents or mistakes.

8. Local Presence and References

a. Local Reputation

Choose a contractor with a strong local presence and positive reputation in your community. Local contractors are familiar with the unique challenges and requirements of your area and are more likely to prioritize customer satisfaction and quality workmanship.

b. References and Portfolio

Request references or examples of past repair projects completed by the contractor. Viewing their portfolio allows you to assess the quality of their work and determine whether they have experience with projects similar to yours.

9. Payment Policies and Financing Options

a. Payment Schedule

Discuss the contractor’s payment policies, including the payment schedule and accepted methods of payment. Avoid contractors who require full payment upfront and opt for those who offer a reasonable payment schedule tied to project milestones.

b. Financing Options

Inquire about financing options or payment plans available for your repair project. Some contractors offer flexible financing solutions to help homeowners manage the cost of repairs without compromising on quality or craftsmanship.

10. Trust Your Instincts

a. Gut Feeling

Ultimately, trust your instincts when selecting a roofing and repair contractor. Choose a contractor that instills confidence and trust, demonstrating professionalism, integrity, and a genuine commitment to your satisfaction.

b. Open Communication

Maintain open communication with the contractor throughout the hiring process and the duration of the project. Clear and transparent communication fosters trust and ensures that both parties are aligned on expectations and objectives.

Conclusion:

Roofing Contractor Huntington Beach CA requires careful consideration of numerous factors to ensure a successful and satisfactory outcome. By evaluating the contractor’s experience, reputation, credentials, communication, and safety practices, you can make an informed decision that meets your needs and exceeds your expectations. Remember to prioritize quality, reliability, and professionalism when selecting a contractor, and trust your instincts to guide you towards the right choice. With the help of this comprehensive guide, you can navigate the process of hiring a roofing and repair contractor with confidence and peace of mind.

Best Roofing Solution – Huntington

19632 Occidental Ln, Huntington Beach, CA 92646, United States

1-714-701-6389

What Are The Top-Rated Roofing Companies In Long Beach? – Best Roofing Solution – Long Beach

Roofing Contractor Long Beach CA is a crucial aspect of homeownership, and finding the right company for the job is paramount. Long Beach residents understand the challenges posed by the local climate, making it essential to choose a top-rated roofing company.

In this article, we will explore the top-rated roofing companies in Long Beach, providing insights into their services, customer satisfaction, and contributions to the community.

Factors to Consider in Roofing Companies

When searching for a roofing company, several factors should be considered. Reputation and reviews, licensing and certifications, and experience in Long Beach are key elements to weigh. These factors ensure that the chosen company can be trusted to handle the unique challenges posed by the local environment.

: Excellence Roofing

Excellence Roofing stands out as a reliable choice for Long Beach residents. With a stellar reputation, this company offers a range of services, from roof repairs to complete installations. Customer testimonials attest to the company’s commitment to quality and professionalism.

: Coastal Roof Solutions

Coastal Roof Solutions is another top player in the industry. Their specialized roofing services and noteworthy projects in Long Beach make them a preferred choice for homeowners seeking excellence. The company’s track record speaks volumes about their dedication to customer satisfaction.

Customer Satisfaction Stories

Real-life experiences with top-rated roofing companies add a personal touch to the decision-making process. Homeowners share positive outcomes and highlight the quality of service received, providing valuable insights for potential customers.

Comparative Analysis of Roofing Materials

Understanding the various roofing materials available is crucial, especially in Long Beach’s climate. Recommendations for materials that withstand the local weather conditions will be explored, guiding homeowners toward informed choices.

: Pacific Peak Roofing

Pacific Peak Roofing is known for its sustainable roofing solutions and community involvement. Their commitment to environmental responsibility sets them apart, making them an excellent choice for those seeking eco-friendly options.

DIY Roof Maintenance Tips

While relying on professionals is essential, homeowners can take proactive measures for roof maintenance. Basic tips for regular inspections and upkeep will be provided, empowering homeowners to play an active role in the longevity of their roofs.

Common Roofing Issues in Long Beach

Understanding common roofing issues in Long Beach, particularly those related to weather, is essential. The article will detail how top-rated companies address these challenges, ensuring the durability of their installations.

: Long Beach Elite Roofers

Long Beach Elite Roofers is a standout company known for its comprehensive services, awards, and recognitions. Their efficiency in project timelines and customer-focused approach make them a reliable choice for homeowners.

Eco-Friendly Roofing Options

The article will delve into environmentally conscious choices in roofing and how top-rated companies contribute to sustainability. With a growing focus on eco-friendly practices, this section provides valuable insights for environmentally conscious consumers.

Cost-Effective Roofing Solutions

For those on a budget, exploring cost-effective roofing options is essential. The article will discuss budget-friendly choices and the availability of financing and payment plans offered by top-rated companies.

: Harbor City Roofing

Harbor City Roofing rounds out our list with an overview of their company, roofing specialties, and customer-focused approach. Their commitment to excellence and personalized service makes them a top contender in the Long Beach roofing scene.

Future Trends in Roofing

As technology continues to advance, so does the roofing industry. The article will explore future trends in roofing, providing readers with insights into innovative solutions that may shape the future of roofing practices.

Conclusion:

In conclusion, the top-rated Roofing Contractor Long Beach CA in Long Beach offer a diverse range of services catering to the unique needs of the local community. Thorough research and consideration of various factors, including reputation, materials, and sustainability, are essential in making an informed decision about roofing services.

Best Roofing Solution – Long Beach

4447 Rutgers Ave, Long Beach, CA 90808, United States

1-562-265-3147

Are There Affordable Roofing Options In Irvine? – Best Roofing Solution – Irvine

Investing in a new Roofing Contractor Irvine CA can be a significant expense, but it’s a crucial one to ensure the longevity and safety of your Irvine home.

The good news is that affordability doesn’t have to compromise quality. In this article, we will explore some affordable roofing options suitable for Irvine’s climate, providing a balance between cost-effectiveness and durability.

Understanding Budget Constraints

Setting Realistic Budget Expectations

Before diving into roofing options, it’s essential to set realistic budget expectations. Consider factors such as the size of your roof, the complexity of the project, and the materials you are willing to explore. Having a clear budget in mind will guide you in making informed decisions.

Exploring Financing Options

If your budget is tight, explore financing options that may be available. Some roofing contractors offer financing plans, and there might be government programs or incentives that can assist with the cost of energy-efficient roofing solutions.

Affordable Roofing Materials

Asphalt Shingles

Asphalt shingles are a cost-effective and popular choice for homeowners in Irvine. They come in various styles and colors, allowing for versatility in achieving the desired look for your home. While they may have a shorter lifespan compared to some premium materials, asphalt shingles are durable and offer excellent value for money.

Composite Shingles

Composite shingles, made from a mixture of materials like asphalt and fiberglass, provide an affordable alternative to traditional wood or slate shingles. They offer durability and come in a wide range of styles, mimicking the appearance of more expensive materials at a fraction of the cost.

Metal Roofing

Metal roofing has become an increasingly affordable option for homeowners in Irvine. While the upfront cost may be higher than some other materials, the longevity and minimal maintenance requirements make it a cost-effective choice over the long term. Additionally, metal roofs offer energy efficiency benefits that can contribute to reduced cooling costs.

Synthetic Roofing Materials

Advancements in technology have led to the development of synthetic roofing materials that replicate the look of premium materials such as slate or wood. These materials are often more affordable while providing comparable aesthetics and durability.

Considering Energy Efficiency

Cool Roofing Options

Cool roofing options, designed to reflect more sunlight and absorb less heat, can contribute to energy efficiency in your home. While some cool roofing materials may have a slightly higher initial cost, the long-term energy savings can make them a financially savvy choice.

Roofing Insulation

Investing in proper roofing insulation can pay off in terms of energy efficiency and cost savings. Adequate insulation helps regulate indoor temperatures, reducing the need for excessive heating or cooling, and ultimately lowering energy bills.

Localized Cost Factors

Availability of Materials

The availability of certain roofing materials in Irvine can impact their affordability. Asphalt shingles, for example, are widely available and tend to be more budget-friendly due to their prevalence in the market.

Labor Costs

Labor costs can vary, and it’s essential to obtain multiple quotes from reputable roofing contractors. Comparing labor costs alongside material costs will give you a comprehensive understanding of the overall expenses.

V. DIY Considerations

Assessing DIY Feasibility

For those with a knack for DIY projects, some roofing tasks can be handled independently, potentially saving on labor costs. However, it’s crucial to evaluate the complexity of the project and ensure that DIY efforts do not compromise the quality and integrity of the roof.

Seeking Professional Advice

Consulting with roofing professionals, even if you plan to handle some tasks yourself, is advisable. They can provide guidance on material selection, installation techniques, and potential challenges specific to Irvine’s climate.

Financing and Incentives

Government Programs

Explore whether there are any government programs or incentives that can alleviate the financial burden of roofing projects. Some energy-efficient roofing solutions may qualify for tax credits or rebates, providing additional savings.

Contractor Financing

Many roofing contractors offer financing options to help homeowners manage the upfront costs. Be sure to inquire about available financing plans and carefully review terms and interest rates.

Conclusion:

In conclusion, finding affordable Roofing Contractor Irvine CA is not only possible but can also lead to a durable and aesthetically pleasing roof. Asphalt shingles, composite shingles, metal roofing, and synthetic materials are all viable choices that balance cost-effectiveness with functionality. Consideration of energy-efficient options and exploring financing opportunities can further enhance the affordability of your roofing project.

Remember to obtain multiple quotes from reputable roofing contractors, assess DIY feasibility cautiously, and explore potential incentives or financing plans. With careful planning and informed decision-making, you can achieve a cost-effective roofing solution that enhances the value and resilience of your Irvine home.

Best Roofing Solution – Irvine

17482 Luther Ave, Irvine, CA 92614, United States

1-949-990-6180

How To Program Genie Remote Garage Door Opener – First Call Garage Doors

Programming a Genie remote for your Garage Door Repair Richmond TX is a straightforward process that allows you to control your garage door conveniently.

Genie provides a variety of remote models, and the programming steps may slightly vary. In this comprehensive guide, we’ll walk you through the general steps for programming a Genie remote garage door opener. Always refer to your specific remote and opener manuals for accurate instructions.

1. Identify Your Genie Garage Door Opener Model:

  • Before you start programming the remote, identify the model of your Genie garage door opener. This information is crucial as programming steps can vary between models.

2. Prepare the Genie Remote:

  • Ensure that the battery in the remote is fresh and properly installed. A weak or dead battery can affect the programming process.

3. Locate the “Learn” Button on the Garage Door Opener:

  • Most Genie garage door openers have a “Learn” or “Program” button on the motor unit. Find this button before starting the programming process. The color of the button may vary (red, purple, or green).

4. Clear Existing Codes (if necessary):

  • If you are adding a new remote or troubleshooting existing issues, it’s advisable to clear the memory of the opener before programming. Press and hold the “Learn” or “Program” button until the indicator light on the opener blinks, indicating that the memory has been cleared.

5. Locate the Remote’s Program Button:

  • Genie remotes typically have a “Learn” or “Program” button. Find and locate this button on your specific remote model.

6. Enter Programming Mode on the Opener:

  • Press and release the “Learn” or “Program” button on the garage door opener motor unit. The indicator light on the opener should start blinking, indicating that the opener is ready to accept a new remote code.

7. Press the Program Button on the Remote:

  • Press and hold the “Learn” or “Program” button on the remote until the indicator light on the opener blinks again. This action sends the remote’s code to the opener.

8. Test the Remote:

  • Test the remote by pressing the programmed button. The garage door should respond by opening or closing. If it doesn’t, repeat the programming steps.

9. Program Additional Buttons (if needed):

  • If your Genie remote has multiple buttons for controlling different doors or features, repeat steps 7 and 8 for each additional button.

10. Homelink Integration (if applicable):

  • If your vehicle is equipped with a Homelink system, you may want to program your Genie remote to work with it. Refer to your vehicle’s owner’s manual for Homelink programming instructions.

11. Aladdin Connect Integration (if applicable):

  • If you have the Genie Aladdin Connect system, follow the specific instructions in the Aladdin Connect manual for integrating the remote with the system.

12. Security+ 2.0 Technology (if applicable):

  • Some Genie openers use Security+ 2.0 technology for enhanced security. If your opener is equipped with this feature, programming may involve additional steps. Refer to your opener’s manual for specific Security+ 2.0 programming instructions.

13. Troubleshooting:

  • If the programming process is unsuccessful, consider the following:
    • Ensure the remote is within range of the garage door opener.
    • Confirm the battery in the remote is functional.
    • Verify that the garage door opener’s antenna is properly extended.
    • Repeat the programming steps carefully.

14. Keep the Manuals for Future Reference:

  • Once you have successfully programmed your Genie remote garage door opener, keep both the remote and opener manuals in a safe place for future reference. They contain valuable information about troubleshooting, maintenance, and additional features.

15. Explore Advanced Features (if applicable):

  • Genie remotes and openers may offer advanced features like the ability to control lights, set timers, or integrate with smart home systems. Consult your manuals for details on these advanced features.

Conclusion:

Programming a Genie remote for your Garage Door Repair Richmond TX is a relatively simple process that enhances the convenience of your garage door system. Following the manufacturer’s instructions and paying attention to specific details for your model ensures a successful programming experience. If you encounter any challenges, refer to your manuals or contact Genie customer support for assistance.

First Call Garage Doors

20527 Farm to Market 1093 Unit B205, Richmond, TX 77407, United States

1-713-248-2684

How To Fix Gap At Bottom Of Garage Door – EDM Garage Doors, LLC

Fixing a gap at the bottom of your Garage Door Repair Volo IL is crucial for maintaining energy efficiency, security, and protection against the elements.

A small gap can let in pests, dirt, and even water, so addressing it promptly is essential. Here’s a detailed guide on how to fix a gap at the bottom of your garage door:

1.Identify the Cause: Begin by determining the cause of the gap. Common reasons include wear and tear, misalignment, or damaged weatherstripping. Inspect the bottom of the door, the seal, and the tracks to identify any visible issues.

2.Replace Weatherstripping: Weatherstripping at the bottom of the garage door is designed to create a seal and prevent drafts. If it’s worn or damaged, replacing it can resolve the gap issue. Measure the length needed, purchase a replacement weatherstrip, and follow the manufacturer’s instructions for installation.

3.Adjust Track Alignment: Misaligned tracks can cause the door to sit unevenly, resulting in a gap. Inspect the tracks on either side of the door for any bends or misalignments. Loosen the screws or bolts securing the tracks, adjust them, and then tighten the hardware again. Use a level to ensure the tracks are straight.

4.Check for Bent or Warped Panels: Inspect the door panels for any signs of damage, particularly bending or warping near the bottom. If you identify any issues, you may need to replace the damaged panels or consult with a professional garage door technician for repairs.

5.Install a Garage Door Threshold Seal: A threshold seal is a rubber strip that attaches to the garage floor, creating a barrier against drafts, water, and pests. Measure the width of your garage door and purchase a threshold seal of the appropriate size. Follow the manufacturer’s instructions to install it along the bottom of the garage door opening.

6.Adjust Limit Settings: If your garage door has an automatic opener, the limit settings may be contributing to the gap. Check your garage door opener manual for instructions on adjusting the limit settings. This ensures that the door closes fully and creates a proper seal.

7.Inspect and Lubricate Hinges: Hinges play a crucial role in the smooth operation of the garage door. Inspect all hinges, especially those at the bottom, for signs of wear or damage. Lubricate them with a silicone-based lubricant to ensure they move freely, reducing stress on the door.

8.Replace Bottom Seal on Retainer: Some garage doors have a bottom seal attached to a retainer. If the seal is damaged or worn, you may need to replace it. Remove the retainer, take out the old seal, and insert a new one. Ensure a snug fit to create an effective barrier against drafts and pests.

9.Consider a Garage Door Bottom Seal Kit: Garage door bottom seal kits are available and often include various components to address gaps. These kits may include a new bottom seal, retainer, and installation hardware. Follow the kit instructions for proper installation.

10.Consult a Professional: If the gap persists or if you are uncertain about performing the repairs yourself, consider consulting a professional garage door technician. They have the expertise to diagnose and fix issues efficiently, ensuring your garage door operates smoothly and seals properly.

In conclusion, fixing a gap at the bottom of your Garage Door Repair Volo IL involves a combination of inspecting, adjusting, and replacing various components. Regular maintenance and prompt attention to any issues can help ensure your garage door provides optimal performance and protection against external elements.

EDM Garage Doors, LLC

596 Richard Brown Blvd, Volo, IL 60073, United States

1-847-416-3036

How Do I Program A Liftmaster Garage Door Opener – Dynamo Overhead Garage Doors LLC

Programming a LiftMaster Garage Door Repair Conroe TX involves a series of steps to synchronize the opener with your garage door remote, keypad, or other control devices.

Whether you are setting up a new LiftMaster garage door opener or reprogramming an existing one, follow this comprehensive guide for a successful programming process:

1. Identify the Type of LiftMaster Garage Door Opener:

  • Determine the type of LiftMaster garage door opener you have. LiftMaster offers various models with different features, including wall-mounted keypads, hand-held remotes, and built-in car remotes.

2. Locate the “Learn” or “Program” Button:

  • Find the “Learn” or “Program” button on your LiftMaster garage door opener. This button is usually located on the motor unit and may be labeled as “Learn,” “Program,” or have a small LED light next to it.

3. Clear Existing Codes (If Needed):

  • If you are reprogramming the opener or adding new devices, it’s advisable to clear existing codes. Press and hold the “Learn” button until the indicator light goes out, indicating that the previous codes have been erased.

4. Get a Sturdy Ladder:

  • Use a sturdy ladder to safely access the LiftMaster garage door opener motor unit. Make sure the ladder is positioned securely on a level surface.

5. Program a Hand-Held Remote:

  • If you have a hand-held remote control:
    • Press and release the “Learn” button on the garage door opener.
    • Within 30 seconds, press and hold the button on the remote control that you want to program.
    • Hold the remote button until the garage door opener lights blink or you hear a clicking sound. This indicates that the programming is successful.
    • Test the remote by pressing the programmed button to open or close the garage door.

6. Program a Wall-Mounted Keypad:

  • If you have a wall-mounted keypad:
    • Enter the manufacturer’s default PIN code or your existing PIN code if reprogramming.
    • Locate the “Learn” button on the garage door opener.
    • Press and release the “Learn” button.
    • Enter a new PIN on the keypad.
    • Press the “Enter” or “Send” button on the keypad.
    • Test the keypad by entering the new PIN and pressing “Enter” to open or close the garage door.

7. Program Built-in Car Remotes:

  • If you have a car with a built-in remote:
    • Consult your vehicle’s owner’s manual for instructions on programming the garage door opener.
    • Typically, you’ll need to press and hold the car remote buttons and simultaneously press the “Learn” button on the garage door opener.

8. Program Homelink (if applicable):

  • If you have Homelink, a universal transmitter integrated into some vehicles:
    • Press and hold the Homelink button in the vehicle until the indicator light starts flashing.
    • While the light is flashing, press and hold the programmed button on the remote control or the “Learn” button on the garage door opener.
    • Release both buttons when the Homelink indicator light changes from a slow to a rapid flash.

9. Test All Programmed Devices:

  • Test all programmed devices to ensure they operate the garage door correctly. Open and close the door multiple times to confirm consistent functionality.

10. Additional Programming (If Applicable): – Some LiftMaster garage door openers offer additional programming options, such as setting travel limits, adjusting the force settings, or programming for additional remotes. Refer to your garage door opener’s user manual for detailed instructions on these advanced programming features.

11. Secure the Remote Codes: – Treat your programmed remote codes with care. Keep them secure and share them only with trusted individuals. Avoid using easily guessable codes like sequential numbers.

12. Troubleshooting: – If a programmed remote or device is not working, check the batteries, ensure the garage door opener has power, and review the programming steps. Consult the user manual for troubleshooting guidance.

13. Contact Customer Support (If Needed): – If issues persist or if you encounter difficulties during programming, contact LiftMaster’s customer support for assistance. They can provide specific guidance based on your opener model.

Conclusion:

Programming a LiftMaster Garage Door Repair Conroe TX is a straightforward process, and following these steps will help you achieve successful synchronization with your remote, keypad, or other control devices. Always refer to your garage door opener’s user manual for model-specific instructions and additional features. Regularly updating your programming and being aware of advanced features will ensure that your LiftMaster garage door opener provides reliable and convenient access to your garage.

Dynamo Overhead Garage Doors LLC

24/7 SERVICES AND EMERGENCY SERVICES (832) 270-3373

1-832-270-3373

How Much To Replace Torsion Spring On Garage Door – Don and Son’s Garage Doors

The cost to replace a Garage Door Repair Coppell TX can vary based on several factors, including the size of the door, the type of spring, labor costs in your region, and whether you choose to do it yourself or hire a professional.

In this comprehensive guide, we’ll explore the factors influencing the cost of torsion spring replacement, provide insights into the types of springs available, and offer tips for making informed decisions.

1. Types of Torsion Springs:

Torsion springs are a crucial component of a garage door system, providing the force needed to lift and lower the door. There are different types of torsion springs, including:

  • Standard Torsion Springs: These are the most common type of torsion springs used in garage doors. They come in various sizes to accommodate different door weights and sizes.
  • Steel Torsion Springs: These springs are known for their durability and strength. They are often used in heavy-duty garage doors.
  • Galvanized Torsion Springs: Galvanized springs are coated with zinc for corrosion resistance, making them suitable for areas with high humidity or salt exposure.

2. Cost Ranges for Torsion Springs:

The cost of torsion spring replacement can vary based on the type and size of the spring. Here are general price ranges:

  • Standard Torsion Springs: $50 – $200 per spring
  • Steel Torsion Springs: $75 – $250 per spring
  • Galvanized Torsion Springs: $100 – $300 per spring

It’s important to note that garage doors typically have two torsion springs installed, and it’s often recommended to replace both springs even if only one has failed. This helps maintain balance and ensures even wear on the springs.

3. Additional Factors Influencing Costs:

  • Size of the Door: The size and weight of the garage door influence the size and strength of the torsion springs needed. Larger and heavier doors require more robust springs, which may cost more.
  • Labor Costs: The cost of labor for torsion spring replacement varies based on location, the complexity of the installation, and whether any additional adjustments are needed. Hiring a professional ensures proper installation and can range from $100 to $300 or more.
  • Emergency Service: If you require immediate or after-hours service, it may come with additional fees. Torsion spring replacement is often considered urgent, so emergency service fees may apply.

4. DIY Torsion Spring Replacement vs. Professional Service:

Replacing torsion springs is a task that requires skill, experience, and safety precautions. Mishandling springs can result in serious injury or further damage to the door. While some experienced DIY enthusiasts may attempt torsion spring replacement themselves, professional service is highly recommended for several reasons:

  • Safety: Torsion springs are under high tension and can be dangerous to work with. Professionals are trained to handle them safely.
  • Expertise: Professionals have the knowledge and experience to determine the correct size and type of springs needed for your specific garage door.
  • Balancing: Properly balancing the torsion springs is crucial for the smooth operation of the garage door. Professionals ensure that the springs are adjusted correctly.
  • Warranty: Professional installation often comes with a warranty, providing peace of mind and protection against issues that may arise.

5. Signs of Torsion Spring Failure:

If you suspect your torsion springs are damaged, look for these signs:

  • A Visible Gap in the Spring: Torsion springs might show a visible gap when they break.
  • Uneven Movement: If the door moves unevenly or appears to be crooked, it may indicate a broken torsion spring.
  • Loud Bang or Snap: A loud noise when the door is in motion can be a sign of a broken torsion spring.

6. Obtaining Multiple Quotes:

To get an accurate estimate for your specific situation, obtain quotes from multiple reputable garage door service professionals. Inquire about the breakdown of costs, including materials, labor, and any additional features or services.

7. Conclusion:

The cost to replace Garage Door Repair Coppell TX depends on factors such as the type and size of the springs, the size of the door, labor costs, and whether you choose professional service. Safety is paramount when dealing with torsion springs, and professional replacement is highly recommended. Consider your budget, preferences, and specific requirements when choosing a torsion spring replacement method. Investing in quality springs and professional service contributes to the efficiency and longevity of your garage door system.

Don and Son’s Garage Doors

1-214-415-4109

How To Program Marantec Garage Door – Circle B Overhead Door

Programming a Marantec Garage Door Repair Bryan TX involves a series of steps that vary based on the specific model you have.

It’s crucial to follow the instructions provided in your garage door opener’s manual, as procedures can differ. Below, I’ll provide a comprehensive guide that covers the general steps for programming a Marantec garage door opener remote.

1. Gather Necessary Information

Before starting the programming process, make sure you have the following information:

  • Model numbers of both the garage door opener and the remote.
  • Access to the garage door opener unit.
  • A working knowledge of the garage door opener system.

2. Identify the Type of Opener

Marantec garage door openers typically use a combination of buttons on the remote and buttons on the opener unit for programming. Identify whether your opener uses a “learn” button or DIP switches.

  • Learn Button: Some Marantec openers have a “learn” button on the motor unit, often near the antenna wire.
  • DIP Switches: DIP switches are small switches that need to be set to the same position on both the remote and the main unit for communication.

3. Locate Learn Button or DIP Switches

Find the “learn” button on the motor unit or the DIP switches on both the remote control and the garage door opener unit. The learn button is typically a colored button, and DIP switches are usually small, located in the remote and the main unit.

4. Clear Existing Codes (if necessary)

Before programming a new remote, clear existing codes. Refer to your manual for instructions, which often involve pressing and holding a specific button until an indicator light blinks.

5. Programming the Remote

  • For Learn Button:
    • Press and release the “learn” button on the motor unit.
    • The indicator light on the unit should illuminate. Within 30 seconds, press and hold the button on the remote that you want to program.
    • Release the button when the light on the motor unit blinks.
  • For DIP Switches:
    • Open the remote control and the garage door opener unit to locate the DIP switches.
    • Use a pen or similar tool to set the DIP switches on the remote to match those on the garage door opener.
    • Reassemble the remote.

6. Test the Remote

After programming, test the remote to ensure it works correctly. Stand within the specified range and press the programmed button on the remote. The garage door should respond accordingly.

7. Repeat if Necessary

If you have multiple remotes, repeat the programming process for each one.

8. Additional Tips and Considerations

  • Battery Check: Ensure the remote’s battery is in good condition, as weak batteries can impact performance.
  • Security Features: Familiarize yourself with any advanced security features your garage door opener might have, and follow additional steps in the manual if needed.

9. Troubleshooting

If the remote doesn’t work, double-check the programming steps, the battery, and the range. Consult the troubleshooting section in your manual or contact Marantec customer support for assistance.

Conclusion:

While this guide provides general instructions, always refer to your specific model’s manual for accurate, model-specific programming instructions. If you encounter difficulties or have questions, don’t hesitate to seek assistance from Marantec’s customer support or consult with a professional Garage Door Repair Bryan TX.

Circle B Overhead Door

1818 Drillers Dr, Bryan, TX 77808, United States

1-979-324-6733

What Are The Top Signs Of A Malfunctioning Torsion Garage Door Spring? – Camco Commercial Door Company

The torsion spring is a critical component of a Garage Door Repair Knoxville TN, playing a pivotal role in balancing the door’s weight and facilitating smooth opening and closing.

When a torsion spring malfunctions, it can lead to operational issues, safety concerns, and potential damage to the door and other components. In this article, we’ll explore the top signs of a malfunctioning torsion garage door spring, helping homeowners identify potential problems and seek timely professional assistance.

1. Unbalanced Door Movement:

One of the primary functions of the torsion spring is to balance the garage door, allowing it to move smoothly and evenly. If you notice that one side of the door is lower than the other or that the door appears to be sagging, it may indicate an issue with the torsion spring. An unbalanced door not only affects the aesthetic appeal but can also lead to strain on the opener system and other components.

2. Difficulty in Opening or Closing

A properly functioning torsion spring ensures that the garage door can be opened and closed effortlessly. If you experience difficulty in lifting the door manually or if the door feels unusually heavy when using the automatic opener, it could be a sign of torsion spring malfunction. The spring may not be providing the necessary counterbalance, making the door operation more strenuous.

3. Visible Gaps or Gaps between Coils:

Inspect the torsion spring for any visible gaps or spaces between the coils. If you notice uneven spacing or a visible separation between coils, it may indicate that the spring is worn out or damaged. These gaps can compromise the spring’s effectiveness and lead to further issues with door movement.

4. Unusual Noises during Operation:

Torsion springs should operate quietly and smoothly. If you start hearing unusual noises such as creaking, grinding, or snapping sounds when opening or closing the garage door, it could be a sign of torsion spring issues. These noises may indicate friction, misalignment, or even a potential break in the spring.

5. Visible Wear and Tear:

Perform a visual inspection of the torsion spring for any signs of wear and tear. Look for rust, corrosion, or visible damage to the coils. Worn-out or damaged springs can compromise their structural integrity, leading to a higher risk of failure. If you observe any visible issues, it’s advisable to seek professional assistance promptly.

6. Lack of Tension or Tension Irregularities:

The torsion spring should be under tension when the garage door is closed. If you can easily move the spring by hand when the door is in the closed position, it may indicate a lack of tension. Conversely, irregular tension, where one side feels tighter than the other, can also be a sign of torsion spring problems.

7. Door Doesn’t Stay Open or Closed:

When a torsion spring is functioning correctly, it provides the necessary counterbalance to keep the garage door open or closed as desired. If the door struggles to stay in the open position or unexpectedly closes, it may indicate a loss of tension in the torsion spring. This issue poses safety risks and requires immediate attention.

8. Sudden Door Movement:

If you notice sudden or jerky movements when opening or closing the garage door, it could be a result of torsion spring issues. A malfunctioning spring may release tension unevenly, leading to erratic door movements. Sudden movements pose safety hazards and should be addressed promptly by a qualified professional.

9. Visible Rust or Corrosion:

Torsion springs are typically exposed to the elements, and over time, they can develop rust or corrosion. Rust weakens the structural integrity of the spring and accelerates wear. If you observe significant rust on the torsion spring, it’s crucial to have it inspected and replaced by a professional to ensure continued reliability.

10. Inconsistent Gap between the Coils:

The coils of a torsion spring should maintain a consistent gap throughout their length. If you notice variations in the gap between coils, such as tight areas followed by loose sections, it may indicate a problem with the spring’s integrity. Inconsistencies in coil spacing can lead to uneven tension and compromised functionality.

11. Visible Wear on the Cable Drum:

The cable drum is another component of the garage door system that works in conjunction with the torsion spring. Inspect the cable drum for any signs of wear, fraying, or damage. A damaged cable drum can affect the performance of the torsion spring and lead to operational issues.

12. Age of the Torsion Springs:

Torsion springs have a limited lifespan, typically ranging from 7 to 15 years, depending on usage and environmental conditions. If your torsion springs are approaching or exceeding their expected lifespan, it’s advisable to proactively replace them, even if you haven’t noticed any specific signs of malfunction. Preventive replacement can avoid sudden failures and enhance the overall safety of the garage door system.

Conclusion:

Recognizing the signs of a malfunctioning torsion Garage Door Spring Repair Knoxville TN is crucial for maintaining the safety and reliability of your garage door system. Homeowners should be vigilant for any unusual movements, sounds, or visual indicators that suggest torsion spring issues. In the event of any suspected problems, seeking the expertise of a professional garage door repair service is essential. Prompt identification and repair of torsion spring issues not only ensure the continued functionality of the garage door but also contribute to the overall safety and longevity of the entire system.

Camco Commercial Door Company

853 East Wolf Valley Rd. Heiskell, TN 37754

1-865-776-9455

Can You Recommend Reliable Mold Detection Services In Houston, Texas? – Mold Testing Houston- North Loop

Houston, Texas, with its warm and humid climate, is susceptible to Mold Testing Services Houston TX, posing potential risks to both property and health.

Detecting mold early is crucial to prevent further damage and mitigate health concerns. In this guide, we will explore reliable mold detection services in Houston, offering insights into reputable companies and factors to consider when choosing a service provider.

  1. Mold Inspection Sciences:Mold Inspection Sciences is a reputable company in Houston known for its comprehensive mold detection services. Their team of certified professionals utilizes advanced technologies to detect and assess mold issues in residential and commercial properties. The company is committed to providing detailed reports and recommendations for effective mold remediation.
  2. Mold Tech Services:Mold Tech Services specializes in mold detection and inspection in the Houston area. Their certified technicians conduct thorough assessments to identify the extent of mold contamination. Known for their customer-centric approach, Mold Tech Services offers tailored solutions to address specific mold issues, ensuring a healthier indoor environment.
  3. Mold Inspection & Testing Houston:This national franchise with a local presence in Houston focuses on mold inspection and testing. The company employs experienced mold inspectors and utilizes cutting-edge equipment to assess indoor air quality and identify mold species. They offer prompt and reliable services, emphasizing transparency in their reporting to guide clients through the remediation process.
  4. Mold Remediation Houston:Mold Remediation Houston provides comprehensive mold detection and remediation services. Their team of specialists conducts thorough inspections, utilizing state-of-the-art equipment to detect hidden mold sources. The company emphasizes the importance of swift action to prevent further damage and health hazards.
  5. Mold Inspection Sciences of Texas:Another branch of Mold Inspection Sciences, this company in Texas is renowned for its commitment to providing accurate and reliable mold detection services. Their certified inspectors use advanced techniques to assess indoor air quality and identify mold contamination. The company’s detailed reports empower clients to make informed decisions about mold remediation.
  6. BioMax Environmental Inc.:BioMax Environmental Inc. is a trusted mold detection company in Houston, specializing in environmental assessments and mold inspections. The company’s experienced professionals employ advanced sampling methods to detect and identify mold species. BioMax Environmental Inc. focuses on delivering personalized solutions to address clients’ specific mold-related concerns.
  7. AdvantaClean of Houston Central:AdvantaClean of Houston Central offers a range of services, including mold detection, inspection, and remediation. The company’s certified technicians employ industry-best practices to identify and mitigate mold issues effectively. AdvantaClean emphasizes transparency and communication throughout the mold remediation process, ensuring customer satisfaction.
  8. Mold Inspection Sciences Texas:Mold Inspection Sciences Texas, not to be confused with the aforementioned Mold Inspection Sciences, is another notable player in the mold detection industry in Houston. The company’s certified inspectors use state-of-the-art equipment to conduct thorough assessments of indoor environments. They provide detailed reports with actionable recommendations, guiding clients through the necessary steps for mold remediation.
  9. Aerobiology Laboratory Associates, Inc.:While not a remediation company, Aerobiology Laboratory Associates, Inc. is a reputable mold detection laboratory serving the Houston area. They specialize in analyzing air and surface samples for mold spores. Their accurate and timely results assist mold detection companies and property owners in identifying the presence and concentration of mold in indoor environments.

Factors to Consider When Choosing a Mold Detection Service:

  1. Certifications and Qualifications:Ensure that the mold detection service is staffed by certified professionals with relevant qualifications. Look for certifications from reputable organizations such as the Institute of Inspection, Cleaning and Restoration Certification (IICRC) or the American Council for Accredited Certification (ACAC).
  2. Experience in the Region:Choose a service provider with experience in the Houston area, as they are likely to be familiar with the local climate and common mold issues specific to the region. Local expertise enhances their ability to accurately assess and address mold problems.
  3. Technological Capabilities:Opt for companies that employ advanced technologies for mold detection. Techniques such as thermal imaging, air sampling, and moisture meters can help identify hidden mold sources and assess the extent of contamination more effectively.
  4. Comprehensive Inspection Services:Look for companies that offer comprehensive inspection services, including both visual assessments and the use of specialized equipment for mold detection. A thorough inspection ensures that all potential mold issues are identified.
  5. Transparency in Reporting:Choose a company that emphasizes transparency in reporting. The mold detection service should provide detailed reports, including findings, recommendations, and, if applicable, a plan for remediation. Clear communication is essential for informed decision-making.
  6. Customer Reviews and Reputation:Read customer reviews and testimonials to gauge the reputation of the mold detection service. Positive reviews from satisfied clients are indicative of a company’s reliability and professionalism. Conversely, frequent negative reviews may be a red flag.
  7. Cost Estimates and Contracts:Request detailed cost estimates from multiple mold detection services in Houston. Be cautious of services that provide significantly lower estimates, as this may indicate a compromise in the quality of their work. Review contracts thoroughly, ensuring that all aspects of the detection process are clearly outlined.
  8. Insurance and Liability Coverage:Verify that the mold detection service carries appropriate insurance and liability coverage. This is crucial in case any issues arise during the detection process or if there are discrepancies in their findings. Insurance coverage protects both parties involved.
  9. Promptness and Efficiency:Mold issues require swift action to prevent further damage and health risks. Choose a mold detection service known for prompt response times and efficient inspection processes. A timely assessment allows for quicker decision-making and remediation planning.

Conclusion:

Reliable Mold Testing Services Houston TX in Houston play a critical role in identifying and addressing mold issues before they escalate. The mentioned companies, such as Mold Inspection Sciences, Mold Tech Services, and Mold Remediation Houston, are known for their expertise and commitment to providing accurate and comprehensive mold detection services. When selecting a mold detection service, consider factors such as certifications, experience, technological capabilities, transparency, customer reviews, and promptness. By choosing a reputable service provider, you can ensure the early detection of mold issues and take proactive steps toward creating a healthier indoor environment for your property and its occupants.

Mold Testing Houston- North Loop

2950 N Loop W #500, Houston, TX 77092

1-832-409-2125

Page 3 of 5

Powered by WordPress & Theme by Anders Norén