Tag: Garage Door Repair Page 2 of 3

How Do I Program A Liftmaster Garage Door Opener – Dynamo Overhead Garage Doors LLC

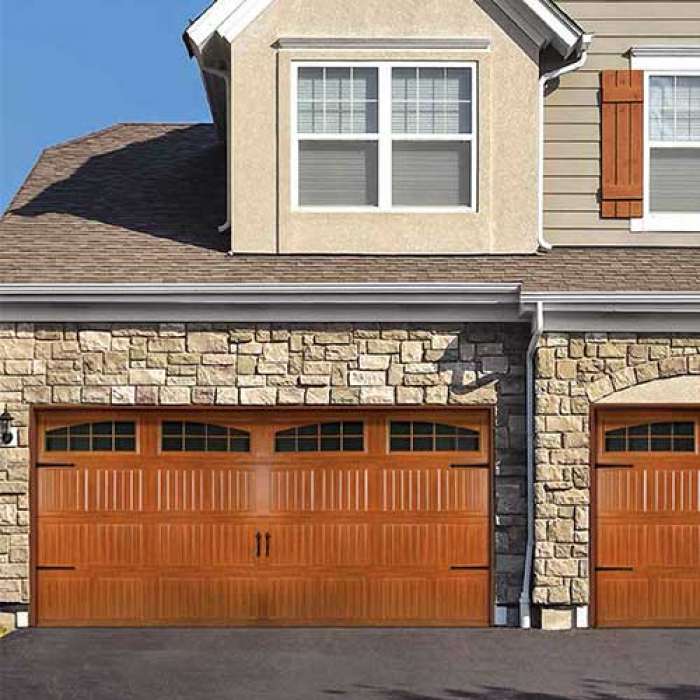
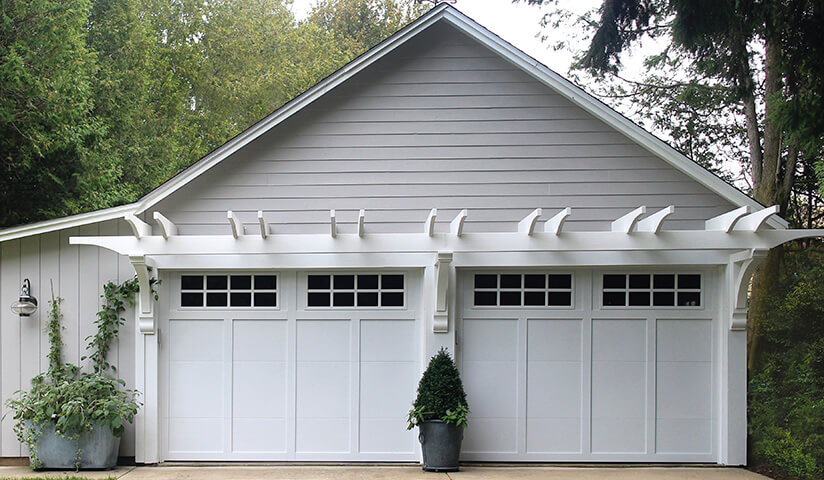
Programming a LiftMaster Garage Door Repair Conroe TX involves a series of steps to synchronize the opener with your garage door remote, keypad, or other control devices.

Whether you are setting up a new LiftMaster garage door opener or reprogramming an existing one, follow this comprehensive guide for a successful programming process:

1. Identify the Type of LiftMaster Garage Door Opener:

  • Determine the type of LiftMaster garage door opener you have. LiftMaster offers various models with different features, including wall-mounted keypads, hand-held remotes, and built-in car remotes.

2. Locate the “Learn” or “Program” Button:

  • Find the “Learn” or “Program” button on your LiftMaster garage door opener. This button is usually located on the motor unit and may be labeled as “Learn,” “Program,” or have a small LED light next to it.

3. Clear Existing Codes (If Needed):

  • If you are reprogramming the opener or adding new devices, it’s advisable to clear existing codes. Press and hold the “Learn” button until the indicator light goes out, indicating that the previous codes have been erased.

4. Get a Sturdy Ladder:

  • Use a sturdy ladder to safely access the LiftMaster garage door opener motor unit. Make sure the ladder is positioned securely on a level surface.

5. Program a Hand-Held Remote:

  • If you have a hand-held remote control:
    • Press and release the “Learn” button on the garage door opener.
    • Within 30 seconds, press and hold the button on the remote control that you want to program.
    • Hold the remote button until the garage door opener lights blink or you hear a clicking sound. This indicates that the programming is successful.
    • Test the remote by pressing the programmed button to open or close the garage door.

6. Program a Wall-Mounted Keypad:

  • If you have a wall-mounted keypad:
    • Enter the manufacturer’s default PIN code or your existing PIN code if reprogramming.
    • Locate the “Learn” button on the garage door opener.
    • Press and release the “Learn” button.
    • Enter a new PIN on the keypad.
    • Press the “Enter” or “Send” button on the keypad.
    • Test the keypad by entering the new PIN and pressing “Enter” to open or close the garage door.

7. Program Built-in Car Remotes:

  • If you have a car with a built-in remote:
    • Consult your vehicle’s owner’s manual for instructions on programming the garage door opener.
    • Typically, you’ll need to press and hold the car remote buttons and simultaneously press the “Learn” button on the garage door opener.

8. Program Homelink (if applicable):

  • If you have Homelink, a universal transmitter integrated into some vehicles:
    • Press and hold the Homelink button in the vehicle until the indicator light starts flashing.
    • While the light is flashing, press and hold the programmed button on the remote control or the “Learn” button on the garage door opener.
    • Release both buttons when the Homelink indicator light changes from a slow to a rapid flash.

9. Test All Programmed Devices:

  • Test all programmed devices to ensure they operate the garage door correctly. Open and close the door multiple times to confirm consistent functionality.

10. Additional Programming (If Applicable): – Some LiftMaster garage door openers offer additional programming options, such as setting travel limits, adjusting the force settings, or programming for additional remotes. Refer to your garage door opener’s user manual for detailed instructions on these advanced programming features.

11. Secure the Remote Codes: – Treat your programmed remote codes with care. Keep them secure and share them only with trusted individuals. Avoid using easily guessable codes like sequential numbers.

12. Troubleshooting: – If a programmed remote or device is not working, check the batteries, ensure the garage door opener has power, and review the programming steps. Consult the user manual for troubleshooting guidance.

13. Contact Customer Support (If Needed): – If issues persist or if you encounter difficulties during programming, contact LiftMaster’s customer support for assistance. They can provide specific guidance based on your opener model.

Conclusion:

Programming a LiftMaster Garage Door Repair Conroe TX is a straightforward process, and following these steps will help you achieve successful synchronization with your remote, keypad, or other control devices. Always refer to your garage door opener’s user manual for model-specific instructions and additional features. Regularly updating your programming and being aware of advanced features will ensure that your LiftMaster garage door opener provides reliable and convenient access to your garage.

Dynamo Overhead Garage Doors LLC

24/7 SERVICES AND EMERGENCY SERVICES (832) 270-3373

1-832-270-3373

How Much To Replace Torsion Spring On Garage Door – Don and Son’s Garage Doors

The cost to replace a Garage Door Repair Coppell TX can vary based on several factors, including the size of the door, the type of spring, labor costs in your region, and whether you choose to do it yourself or hire a professional.

In this comprehensive guide, we’ll explore the factors influencing the cost of torsion spring replacement, provide insights into the types of springs available, and offer tips for making informed decisions.

1. Types of Torsion Springs:

Torsion springs are a crucial component of a garage door system, providing the force needed to lift and lower the door. There are different types of torsion springs, including:

  • Standard Torsion Springs: These are the most common type of torsion springs used in garage doors. They come in various sizes to accommodate different door weights and sizes.
  • Steel Torsion Springs: These springs are known for their durability and strength. They are often used in heavy-duty garage doors.
  • Galvanized Torsion Springs: Galvanized springs are coated with zinc for corrosion resistance, making them suitable for areas with high humidity or salt exposure.

2. Cost Ranges for Torsion Springs:

The cost of torsion spring replacement can vary based on the type and size of the spring. Here are general price ranges:

  • Standard Torsion Springs: $50 – $200 per spring
  • Steel Torsion Springs: $75 – $250 per spring
  • Galvanized Torsion Springs: $100 – $300 per spring

It’s important to note that garage doors typically have two torsion springs installed, and it’s often recommended to replace both springs even if only one has failed. This helps maintain balance and ensures even wear on the springs.

3. Additional Factors Influencing Costs:

  • Size of the Door: The size and weight of the garage door influence the size and strength of the torsion springs needed. Larger and heavier doors require more robust springs, which may cost more.
  • Labor Costs: The cost of labor for torsion spring replacement varies based on location, the complexity of the installation, and whether any additional adjustments are needed. Hiring a professional ensures proper installation and can range from $100 to $300 or more.
  • Emergency Service: If you require immediate or after-hours service, it may come with additional fees. Torsion spring replacement is often considered urgent, so emergency service fees may apply.

4. DIY Torsion Spring Replacement vs. Professional Service:

Replacing torsion springs is a task that requires skill, experience, and safety precautions. Mishandling springs can result in serious injury or further damage to the door. While some experienced DIY enthusiasts may attempt torsion spring replacement themselves, professional service is highly recommended for several reasons:

  • Safety: Torsion springs are under high tension and can be dangerous to work with. Professionals are trained to handle them safely.
  • Expertise: Professionals have the knowledge and experience to determine the correct size and type of springs needed for your specific garage door.
  • Balancing: Properly balancing the torsion springs is crucial for the smooth operation of the garage door. Professionals ensure that the springs are adjusted correctly.
  • Warranty: Professional installation often comes with a warranty, providing peace of mind and protection against issues that may arise.

5. Signs of Torsion Spring Failure:

If you suspect your torsion springs are damaged, look for these signs:

  • A Visible Gap in the Spring: Torsion springs might show a visible gap when they break.
  • Uneven Movement: If the door moves unevenly or appears to be crooked, it may indicate a broken torsion spring.
  • Loud Bang or Snap: A loud noise when the door is in motion can be a sign of a broken torsion spring.

6. Obtaining Multiple Quotes:

To get an accurate estimate for your specific situation, obtain quotes from multiple reputable garage door service professionals. Inquire about the breakdown of costs, including materials, labor, and any additional features or services.

7. Conclusion:

The cost to replace Garage Door Repair Coppell TX depends on factors such as the type and size of the springs, the size of the door, labor costs, and whether you choose professional service. Safety is paramount when dealing with torsion springs, and professional replacement is highly recommended. Consider your budget, preferences, and specific requirements when choosing a torsion spring replacement method. Investing in quality springs and professional service contributes to the efficiency and longevity of your garage door system.

Don and Son’s Garage Doors

1-214-415-4109

How To Program Marantec Garage Door – Circle B Overhead Door

Programming a Marantec Garage Door Repair Bryan TX involves a series of steps that vary based on the specific model you have.

It’s crucial to follow the instructions provided in your garage door opener’s manual, as procedures can differ. Below, I’ll provide a comprehensive guide that covers the general steps for programming a Marantec garage door opener remote.

1. Gather Necessary Information

Before starting the programming process, make sure you have the following information:

  • Model numbers of both the garage door opener and the remote.
  • Access to the garage door opener unit.
  • A working knowledge of the garage door opener system.

2. Identify the Type of Opener

Marantec garage door openers typically use a combination of buttons on the remote and buttons on the opener unit for programming. Identify whether your opener uses a “learn” button or DIP switches.

  • Learn Button: Some Marantec openers have a “learn” button on the motor unit, often near the antenna wire.
  • DIP Switches: DIP switches are small switches that need to be set to the same position on both the remote and the main unit for communication.

3. Locate Learn Button or DIP Switches

Find the “learn” button on the motor unit or the DIP switches on both the remote control and the garage door opener unit. The learn button is typically a colored button, and DIP switches are usually small, located in the remote and the main unit.

4. Clear Existing Codes (if necessary)

Before programming a new remote, clear existing codes. Refer to your manual for instructions, which often involve pressing and holding a specific button until an indicator light blinks.

5. Programming the Remote

  • For Learn Button:
    • Press and release the “learn” button on the motor unit.
    • The indicator light on the unit should illuminate. Within 30 seconds, press and hold the button on the remote that you want to program.
    • Release the button when the light on the motor unit blinks.
  • For DIP Switches:
    • Open the remote control and the garage door opener unit to locate the DIP switches.
    • Use a pen or similar tool to set the DIP switches on the remote to match those on the garage door opener.
    • Reassemble the remote.

6. Test the Remote

After programming, test the remote to ensure it works correctly. Stand within the specified range and press the programmed button on the remote. The garage door should respond accordingly.

7. Repeat if Necessary

If you have multiple remotes, repeat the programming process for each one.

8. Additional Tips and Considerations

  • Battery Check: Ensure the remote’s battery is in good condition, as weak batteries can impact performance.
  • Security Features: Familiarize yourself with any advanced security features your garage door opener might have, and follow additional steps in the manual if needed.

9. Troubleshooting

If the remote doesn’t work, double-check the programming steps, the battery, and the range. Consult the troubleshooting section in your manual or contact Marantec customer support for assistance.

Conclusion:

While this guide provides general instructions, always refer to your specific model’s manual for accurate, model-specific programming instructions. If you encounter difficulties or have questions, don’t hesitate to seek assistance from Marantec’s customer support or consult with a professional Garage Door Repair Bryan TX.

Circle B Overhead Door

1818 Drillers Dr, Bryan, TX 77808, United States

1-979-324-6733

What Are The Top Signs Of A Malfunctioning Torsion Garage Door Spring? – Camco Commercial Door Company

The torsion spring is a critical component of a Garage Door Repair Knoxville TN, playing a pivotal role in balancing the door’s weight and facilitating smooth opening and closing.

When a torsion spring malfunctions, it can lead to operational issues, safety concerns, and potential damage to the door and other components. In this article, we’ll explore the top signs of a malfunctioning torsion garage door spring, helping homeowners identify potential problems and seek timely professional assistance.

1. Unbalanced Door Movement:

One of the primary functions of the torsion spring is to balance the garage door, allowing it to move smoothly and evenly. If you notice that one side of the door is lower than the other or that the door appears to be sagging, it may indicate an issue with the torsion spring. An unbalanced door not only affects the aesthetic appeal but can also lead to strain on the opener system and other components.

2. Difficulty in Opening or Closing

A properly functioning torsion spring ensures that the garage door can be opened and closed effortlessly. If you experience difficulty in lifting the door manually or if the door feels unusually heavy when using the automatic opener, it could be a sign of torsion spring malfunction. The spring may not be providing the necessary counterbalance, making the door operation more strenuous.

3. Visible Gaps or Gaps between Coils:

Inspect the torsion spring for any visible gaps or spaces between the coils. If you notice uneven spacing or a visible separation between coils, it may indicate that the spring is worn out or damaged. These gaps can compromise the spring’s effectiveness and lead to further issues with door movement.

4. Unusual Noises during Operation:

Torsion springs should operate quietly and smoothly. If you start hearing unusual noises such as creaking, grinding, or snapping sounds when opening or closing the garage door, it could be a sign of torsion spring issues. These noises may indicate friction, misalignment, or even a potential break in the spring.

5. Visible Wear and Tear:

Perform a visual inspection of the torsion spring for any signs of wear and tear. Look for rust, corrosion, or visible damage to the coils. Worn-out or damaged springs can compromise their structural integrity, leading to a higher risk of failure. If you observe any visible issues, it’s advisable to seek professional assistance promptly.

6. Lack of Tension or Tension Irregularities:

The torsion spring should be under tension when the garage door is closed. If you can easily move the spring by hand when the door is in the closed position, it may indicate a lack of tension. Conversely, irregular tension, where one side feels tighter than the other, can also be a sign of torsion spring problems.

7. Door Doesn’t Stay Open or Closed:

When a torsion spring is functioning correctly, it provides the necessary counterbalance to keep the garage door open or closed as desired. If the door struggles to stay in the open position or unexpectedly closes, it may indicate a loss of tension in the torsion spring. This issue poses safety risks and requires immediate attention.

8. Sudden Door Movement:

If you notice sudden or jerky movements when opening or closing the garage door, it could be a result of torsion spring issues. A malfunctioning spring may release tension unevenly, leading to erratic door movements. Sudden movements pose safety hazards and should be addressed promptly by a qualified professional.

9. Visible Rust or Corrosion:

Torsion springs are typically exposed to the elements, and over time, they can develop rust or corrosion. Rust weakens the structural integrity of the spring and accelerates wear. If you observe significant rust on the torsion spring, it’s crucial to have it inspected and replaced by a professional to ensure continued reliability.

10. Inconsistent Gap between the Coils:

The coils of a torsion spring should maintain a consistent gap throughout their length. If you notice variations in the gap between coils, such as tight areas followed by loose sections, it may indicate a problem with the spring’s integrity. Inconsistencies in coil spacing can lead to uneven tension and compromised functionality.

11. Visible Wear on the Cable Drum:

The cable drum is another component of the garage door system that works in conjunction with the torsion spring. Inspect the cable drum for any signs of wear, fraying, or damage. A damaged cable drum can affect the performance of the torsion spring and lead to operational issues.

12. Age of the Torsion Springs:

Torsion springs have a limited lifespan, typically ranging from 7 to 15 years, depending on usage and environmental conditions. If your torsion springs are approaching or exceeding their expected lifespan, it’s advisable to proactively replace them, even if you haven’t noticed any specific signs of malfunction. Preventive replacement can avoid sudden failures and enhance the overall safety of the garage door system.

Conclusion:

Recognizing the signs of a malfunctioning torsion Garage Door Spring Repair Knoxville TN is crucial for maintaining the safety and reliability of your garage door system. Homeowners should be vigilant for any unusual movements, sounds, or visual indicators that suggest torsion spring issues. In the event of any suspected problems, seeking the expertise of a professional garage door repair service is essential. Prompt identification and repair of torsion spring issues not only ensure the continued functionality of the garage door but also contribute to the overall safety and longevity of the entire system.

Camco Commercial Door Company

853 East Wolf Valley Rd. Heiskell, TN 37754

1-865-776-9455

What Troubleshooting Tips Can Effectively Solve Garage Door Repair Problems? – Brothers Garage Door Service

A malfunctioning Garage Door Repair Livonia MI can disrupt your daily routine and compromise the security of your home.

While some issues may require professional attention, there are several troubleshooting tips that homeowners can employ to identify and address common garage door problems. In this article, we’ll explore practical tips for becoming an effective garage door repair problem solver.

1. Start with Visual Inspection:

Before delving into complex troubleshooting, start with a visual inspection of your garage door system. Look for obvious signs of wear, damage, or misalignment. Check the tracks, springs, cables, rollers, and hinges for any visible issues. Identifying visible problems can provide valuable insights into the potential cause of the malfunction.

2. Listen for Unusual Noises:

Pay attention to the sounds your garage door makes during operation. Unusual noises, such as grinding, squeaking, or banging, may indicate specific issues. For example, grinding noises could suggest worn-out gears or lack of lubrication, while squeaking may be a sign of friction between moving parts. Listening for these sounds can help narrow down the possible causes of the problem.

3. Test the Balance of the Door:

An imbalanced garage door can strain the opener and lead to premature wear on components. To test the balance, close the door and disconnect the opener by pulling the release cord. Manually lift the door halfway and let go. If the door stays in place, it is well-balanced. If it moves up or down, it may indicate a balance issue that needs attention.

4. Inspect and Lubricate Moving Parts:

Lack of lubrication is a common cause of garage door issues. Inspect the moving parts, including springs, rollers, and hinges, and ensure they are well-lubricated. Use a high-quality silicone or lithium-based lubricant to reduce friction and enhance the smooth operation of the door. Regular lubrication can prevent wear and tear, extending the lifespan of your garage door components.

5. Check the Alignment of the Tracks:

Misaligned tracks can lead to a range of problems, including uneven door movement and difficulty in opening or closing. Inspect the tracks for gaps, bends, or misalignments. Use a level to ensure that the tracks are properly aligned. If you notice issues, carefully adjust the tracks to restore proper alignment.

6. Examine the Springs:

Garage door springs are essential for counterbalancing the weight of the door. Broken or worn-out springs can lead to difficulty in lifting the door or cause it to become unbalanced. Inspect the springs for any signs of damage or wear. If you notice issues, it’s recommended to seek professional assistance, as handling springs can be dangerous.

7. Test the Photo-Eye Sensors:

Modern garage doors are equipped with photo-eye sensors that prevent the door from closing if an obstruction is detected. Ensure that the sensors are properly aligned and free from dirt or debris. Clean the sensor lenses with a soft, dry cloth and check for any obstructions in the sensor’s line of sight. Properly functioning sensors contribute to the safe operation of your garage door.

8. Verify the Remote Control Batteries:

If your garage door is not responding to remote control commands, check the batteries in the remote. Weak or dead batteries can lead to communication issues between the remote and the opener. Replace the batteries with fresh ones and test the remote control to see if the issue is resolved.

9. Inspect the Garage Door Opener:

The garage door opener is a critical component of the system. Inspect the opener for any visible issues, such as loose wires, damaged components, or signs of overheating. Ensure that the opener is securely mounted to the ceiling and that all connections are tight. If you’re unable to identify the problem, it may be time to consult a professional technician.

10. Test the Emergency Release Mechanism:

The emergency release mechanism allows you to manually operate the garage door in case of a power outage or opener malfunction. Test the emergency release by pulling the release cord. If the door is difficult to operate manually or does not stay in place when partially open, there may be an issue with the door’s balance or components.

Conclusion: Empowering Homeowners to Solve Garage Door Issues:

Becoming a Garage Door Repair Livonia MI solver involves a combination of visual inspection, listening for clues, testing components, and employing basic troubleshooting techniques. While some issues may require professional expertise, these tips can help homeowners identify and address common problems, contributing to the efficient and reliable operation of their garage doors. Regular maintenance and proactive troubleshooting empower homeowners to take control of the condition of their garage door systems and ensure the longevity of these essential components.

Brothers Garage Door Service

29522 Wentworth St, Livonia, MI 48154, United States

1-734-292-0971

What Is The Timeline Of New Garage Door Installation – Bluegrass Garage Doors Sales, Service & Installation

Investing in a new Garage Door Repair Louisville KY is an exciting decision that can enhance the curb appeal, functionality, and security of your home.

As with any home improvement project, understanding the timeline of new garage door installation is essential for proper planning and expectations. In this comprehensive guide, we’ll explore the various factors that influence the duration of the installation process and provide insights into what homeowners can expect at each stage.

1. Initial Consultation and Assessment:

The process of installing a new garage door typically begins with an initial consultation with a garage door professional. During this stage, a technician assesses the existing garage door, takes measurements, and discusses the homeowner’s preferences, style choices, and any specific requirements.

Timeline:

The initial consultation and assessment usually take about 1 to 2 hours, depending on the complexity of the project and the amount of information to be discussed.

Tips:

Be prepared to share your preferences regarding design, material, insulation, and any additional features you may want.

Use this time to ask questions and address any concerns you may have about the installation process.

2. Product Selection and Ordering:

After the assessment, the next step involves selecting the garage door style, material, color, and any additional features. Once the choices are made, the garage door professional will place an order for the selected door with the chosen specifications.

Timeline:

The product selection and ordering process typically takes 1 to 2 weeks. The timeline may vary based on the availability of the chosen door and any customization options.

Tips:

Take the time to carefully consider your choices, as the selected garage door will impact the aesthetics and functionality of your home.

Confirm the expected delivery date with the garage door professional.

3. Pre-Installation Preparation:

Before the actual installation, some preparatory steps are taken to ensure a smooth process. This may involve clearing the garage space, removing any obstructions, and preparing the existing garage door for removal.

Timeline:

Pre-installation preparation can take a few days to a week, depending on the condition of the existing garage door and the level of preparation needed.

Tips:

Clear the garage space of any vehicles, belongings, or obstacles to provide a clean and accessible work area.

Inform the installation team of any specific considerations, such as limited access or unique architectural features.

4. Removal of Existing Garage Door:

The removal of the existing garage door is a crucial step in the installation process. This involves dismantling and disposing of the old door, tracks, and hardware.

Timeline:

The removal process usually takes 1 day, although it may extend to 2 days for more complex installations or larger doors.

Tips:

Ensure that the installation team properly disposes of the old door and debris.

Discuss any concerns or preferences regarding the removal process with the installation team.

5. Installation of New Garage Door:

With the old door removed, the installation team begins the process of installing the new garage door. This includes assembling the door sections, installing the tracks, attaching hardware, and ensuring proper alignment.

Timeline:

The installation of a new garage door typically takes 1 to 2 days, depending on the complexity of the door, the size of the opening, and any additional features.

Tips:

Plan for a day or two when your garage may be inaccessible during the installation process.

Communicate with the installation team if you have specific preferences or concerns regarding the installation.

6. Testing and Adjustment:

After the installation is complete, the garage door undergoes thorough testing to ensure smooth and proper operation. This includes testing the opening and closing mechanisms, checking safety features, and making any necessary adjustments.

Timeline:

Testing and adjustment generally take 1 day, but it may extend to 2 days if additional fine-tuning is required.

Tips:

Take the time to test the garage door yourself and familiarize yourself with its operation.

Communicate any concerns or adjustments needed during the testing phase.

7. Final Inspection and Approval:

Once the installation and testing are complete, a final inspection is conducted to ensure that the new garage door meets quality standards and adheres to safety regulations. The homeowner is then invited to inspect the installation and provide approval.

Timeline:

The final inspection and approval process typically take a few hours on the same day as the testing and adjustment phase.

Tips:

Thoroughly inspect the new Garage Door Repair Louisville KY and its components.

Address any final questions or concerns with the installation team during the inspection.

8. Post-Installation Cleanup:

The installation team performs a post-installation cleanup to ensure that the work area is left in pristine condition. This includes removing any debris, packaging materials, and conducting a final check for any tools or equipment.

Timeline:

Post-installation clean-up usually takes a few hours on the same day as the final inspection.

Tips:

Confirm with the installation team that the cleanup is complete and that the work area is left in satisfactory condition.

Express any final considerations or feedback to the installation team

Bluegrass Garage Doors Sales, Service & Installation

1-270-898-1399

Repair Or Replace? Making Informed Decisions For Your Garage Door

The Garage Door Repairs Rockwall TX, a significant component of your home, plays a crucial role in security, convenience, and curb appeal. When faced with issues such as malfunctions, wear, or damage, homeowners are often confronted with the decision of whether to repair the existing garage door or opt for a replacement.

In this article, we will explore factors to consider when making this decision, helping homeowners make informed choices that align with their needs and preferences.

1. Assessing the Extent of Damage:

The first step in deciding whether to repair or replace your garage door is to assess the extent of the damage. Minor issues, such as a single panel dent or a malfunctioning opener, may be suitable for repairs. However, extensive damage, such as multiple panel dents, severe structural issues, or motor failure, may indicate the need for a replacement.

Action Steps:

Evaluate the number and severity of issues affecting the garage door.

Consider whether the damage is limited to specific components or is widespread.

Consult with a professional garage door technician for a comprehensive assessment.

2. Age and Lifespan of the Garage Door:

Consider the age of your garage door and its expected lifespan. Garage doors have a finite lifespan, typically ranging from 15 to 30 years, depending on factors such as materials, usage, and maintenance. If your door is nearing the end of its expected lifespan and experiencing frequent issues, investing in a replacement might be a more cost-effective and long-term solution.

Considerations:

Determine the approximate age of your garage door.

Research the expected lifespan of the specific door model and materials.

Compare the cost of repairs against the investment in a new garage door.

3. Cost of Repairs vs. Replacement:

Comparing the cost of repairs to the cost of a replacement is a critical factor in the decision-making process. While repairs may seem like a more immediate and cost-effective solution, it’s essential to consider the long-term financial implications. Frequent or extensive repairs can accumulate, making a replacement a more economical choice in the long run.

Cost Considerations:

Obtain quotes for necessary repairs from professional technicians.

Research the cost of new garage doors that meet your specifications.

Compare the total cost of repairs over time against the cost of replacement.

4. Energy Efficiency and Technology Upgrades:

Advancements in technology and energy efficiency have resulted in garage doors with enhanced features. If your current garage door lacks insulation, energy-efficient materials, or modern safety features, a replacement may provide an opportunity to upgrade to a more technologically advanced and energy-efficient model.

Upgrade Considerations: 

Assess the energy efficiency of your existing garage door.

Explore modern garage door features, such as smart technology and insulation.

Consider the long-term savings associated with energy-efficient upgrades.

5. Aesthetic Preferences and Curb Appeal:

The aesthetic appeal of your garage door contributes significantly to your home’s overall curb appeal. If your current door is outdated, worn, or doesn’t align with your aesthetic preferences, a replacement can be an opportunity to enhance the visual appeal of your home. Modern garage doors come in a variety of styles, colors, and materials to suit different architectural designs.

Aesthetic Considerations:

Evaluate the current aesthetic condition of your garage door.

Explore different styles, colors, and materials available for replacement doors.

Consider how a new garage door can enhance the overall curb appeal of your home.

6. Frequency of Repairs and Ongoing Maintenance:

Consider the frequency of repairs and the ongoing maintenance required for your current garage door. If you find yourself repeatedly dealing with malfunctions, breakdowns, or the need for continuous maintenance, it may indicate that the door is reaching the end of its practical lifespan. In such cases, a replacement could provide a more reliable and hassle-free solution.

Maintenance Considerations:

Assess the frequency of recent repairs and maintenance.

Consider the inconvenience and downtime associated with frequent repairs.

Evaluate whether ongoing maintenance costs are becoming prohibitive.

7. Long-Term Homeownership Plans:

Consider your long-term homeownership plans when deciding between repair and replacement. If you plan to stay in your current home for an extended period, investing in a new and reliable garage door can provide long-term benefits. On the other hand, if you’re considering selling your home in the near future, repairs may be a more immediate and cost-effective solution.

Homeownership Plans:

Evaluate your long-term plans for staying in your current home.

Consider how a new garage door contributes to the resale value of your property.

Assess the return on investment for repairs versus a replacement in the context of your homeownership plans.

Conclusion:

Ultimately, the decision to repair or replace your Garage Door Repairs Rockwall TX depends on a combination of factors, including the extent of damage, the age of the door, cost considerations, energy efficiency, aesthetic preferences, frequency of repairs, ongoing maintenance, and long-term homeownership plans. Consulting with a professional garage door technician can provide valuable insights and recommendations based on the specific conditions of your door. By carefully weighing these factors, homeowners can make informed decisions that align with their priorities, budget, and the overall well-being of their home.

BH Garage Doors and Gates

1-214-206-5231

How Can One Prevent Costly Garage Door Repairs Through Proactive Steps? – Atlas Door Company

A smoothly functioning Garage Door Repair Joshua TX is not only convenient but also crucial for the security and aesthetics of your home.

Regular usage, exposure to the elements, and the wear and tear that naturally occur over time can lead to garage door issues. While repairs may be inevitable, there are proactive steps homeowners can take to avoid expensive garage door repairs. In this article, we’ll explore practical measures and preventive maintenance tips that can help you keep your garage door in top condition and minimize the risk of costly repairs.

1. Regular Visual Inspections:

Routine visual inspections are a fundamental aspect of preventive maintenance. Take the time to visually inspect your garage door and its components regularly. Look for signs of wear, rust, misalignment, or damage. Pay attention to the tracks, springs, cables, and rollers. Identifying potential issues early on allows you to address them before they escalate into more significant problems.

2. Lubricate Moving Parts:

Proper lubrication is essential for the smooth operation of your garage door. Apply a high-quality lubricant to moving parts such as rollers, hinges, tracks, and springs. Regular lubrication reduces friction, minimizes wear and tear, and helps prevent components from seizing up. Be sure to follow the manufacturer’s recommendations for the type of lubricant to use and the frequency of application.

3. Tighten Loose Hardware:

Over time, the constant movement of a garage door can cause nuts, bolts, and other hardware to loosen. Regularly inspect and tighten any loose hardware, including screws, nuts, and bolts. Pay special attention to the brackets holding the tracks in place. Keeping all components securely fastened contributes to the overall stability and functionality of the garage door.

4. Test the Balance of the Door:

An imbalanced garage door can put excessive strain on the opener and other components, leading to premature wear. Test the balance of your garage door by disconnecting the opener and manually lifting the door halfway. If the door stays in place, it’s properly balanced. If it moves up or down, it indicates an imbalance that should be addressed promptly to prevent strain on the entire system.

5. Check and Replace Weather Stripping:

Weather-stripping plays a crucial role in protecting your garage from the elements. It helps keep out moisture, drafts, and debris. Inspect the weather stripping regularly and replace any damaged or worn sections. Proper weather sealing not only extends the life of your garage door but also prevents issues such as rust and water damage.

6. Keep the Tracks Clean:

The tracks guide the movement of the garage door, and any obstruction or debris can lead to misalignment and operational issues. Regularly clean the tracks using a soft brush or cloth to remove dirt, leaves, or other debris. Avoid using harsh chemicals, as they can damage the tracks or rollers. A clean and debris-free track ensures smooth and efficient door movement.

7. Test Safety Features:

Garage doors are equipped with safety features such as photo-eye sensors that detect obstacles in the door’s path. Regularly test these safety features to ensure they are functioning correctly. Place an object in the door’s path and attempt to close it. The door should reverse immediately upon encountering the obstruction. If the safety features are not working as intended, it’s crucial to address the issue promptly to avoid safety hazards and potentially costly repairs.

8. Avoid DIY Repairs for Complex Issues:

While some minor maintenance tasks can be handled by homeowners, it’s essential to recognize the limitations of DIY repairs. Complex issues, such as spring replacement or opener malfunctions, require specialized knowledge and tools. Attempting to address these issues without the necessary expertise can lead to further damage and, ultimately, more expensive repairs. For such tasks, it’s advisable to seek the assistance of professional garage door technicians.

9. Mindful Operation:

Be mindful of how you operate your garage door. Avoid slamming the door shut or forcefully stopping it during operation. Such practices can put unnecessary strain on the components, leading to premature wear and tear. Operate the door smoothly and patiently, allowing it to complete its cycle without abrupt stops or starts.

10. Professional Annual Inspections:

While regular DIY maintenance is crucial, scheduling professional annual inspections is equally important. A trained garage door technician can conduct a comprehensive assessment, identifying potential issues that may go unnoticed during routine inspections. Professional inspections provide an opportunity to address emerging problems and implement preventive measures that can save you from expensive repairs down the line.

Conclusion: Proactive Care for Longevity and Cost Savings:

In conclusion, proactive maintenance and mindful operation are key to avoiding expensive Garage Door Repair Joshua TX. Regular visual inspections, lubrication, tightening loose hardware, testing safety features, and professional annual inspections contribute to the overall health of your garage door system. By addressing minor issues promptly and adhering to a preventive maintenance routine, homeowners can extend the lifespan of their garage doors and minimize the risk of costly repairs. Remember that when in doubt or faced with complex issues, seeking the expertise of professional garage door technicians is a prudent investment in the long-term functionality and efficiency of your garage door.

Atlas Door Company

6817 Sundance Cir W, Joshua, TX 76058, United States

1-817-295-3660

How To Manually Open My Garage Door – Dallas-Fort Worth Metropolitan Area

Garage Door Repair Fort Worth TX is a crucial skill to have in case of a power outage, a malfunctioning automatic opener, or any other unforeseen circumstances.

The process may vary slightly depending on the type of garage door and its mechanisms, but the general steps are applicable to most residential garage doors. Here’s a comprehensive guide with step-by-step instructions:

: Identify the Type of Garage Door

Before proceeding, it’s essential to identify whether your garage door has extension springs or torsion springs. Extension springs run along the horizontal tracks on either side of the door, while torsion springs are mounted on a metal rod above the door. Knowing the type of springs will help you understand the manual operation process.

: Locate the Emergency Release Cord

Most garage doors are equipped with an emergency release cord, often colored red or marked for easy identification. The release cord is typically located near the center of the garage door, hanging down from the track. If you have trouble finding it, consult your garage door opener’s manual.

: Pull Down on the Emergency Release Cord

Once you’ve located the emergency release cord, pull it down firmly. This action disengages the garage door from the automatic opener carriage, allowing you to operate the door manually. You may need to use a stepladder to reach the cord if it’s positioned high.

: Check for Smooth Movement

After pulling down the emergency release cord, manually move the garage door up and down along its tracks to ensure smooth and unrestricted movement. Be cautious and avoid placing your hands or fingers near moving parts.

: Secure the Door in the Open Position

If you need to keep the garage door open for an extended period or while working inside, use a locking mechanism to secure the door. Some doors have built-in locks, while others may require additional tools such as c-clamps to keep the door securely in the open position.

: Close the Door Manually

When it’s time to close the garage door manually, release any locks or clamps and carefully lower the door. Use your body weight to control the descent of the door and avoid allowing it to slam shut.

: Re-engage the Automatic Opener

Once power is restored or the issue with the automatic opener is resolved, you’ll need to re-engage the garage door to the opener. This is done by pulling up on the emergency release cord until it clicks back into place with the automatic opener carriage.

: Test the Automatic Opener

After re-engaging the automatic opener, test its functionality using the remote control or wall-mounted button. Ensure that the door opens and closes smoothly with the automatic opener.

: Perform Regular Maintenance

To prevent issues and ensure smooth manual and automatic operation, perform regular maintenance on your garage door. Lubricate moving parts, inspect for wear and tear, and address any problems promptly to keep your garage door functioning optimally.

Conclusion:

Knowing how to Garage Door Repair Fort Worth TX is a valuable skill for homeowners. Regularly check the functionality of the emergency release cord and practice manual operation to stay informed and prepared for unexpected situations. By following these steps and exercising caution, you can confidently handle manual garage door operation when needed, ensuring continued access to your garage even in challenging circumstances.

Fort Worth, Texas

1-817-646-3237

2129 Tippy Ter, Fort Worth, TX 76134

How To Install Clopay Garage Door Keyed Lock Set – All American Doors

Installing a Garage Door Repair Miami FL is a relatively straightforward process that adds an extra layer of security to your garage.

A keyed lock set typically includes a lock cylinder, a latch or lock mechanism, and keys for secure access. Here’s a step-by-step guide to help you install a Clopay garage door keyed lock set:

: Gather Tools and Materials

Before you begin, gather all the necessary tools and materials for the installation. You’ll need a power drill, screwdrivers, pliers, a measuring tape, and the parts provided in the Clopay garage door keyed lock set.

: Choose the Location

Select the location on your garage door where you want to install the keyed lock set. It’s usually placed near the center of the door, between the second and third sections, but you can choose a location that suits your preference.

: Measure and Mark

Measure the distance between the center of the first and second panel of the garage door. Mark the center point on the garage door using a pencil.

: Position the Lock Cylinder

Position the lock cylinder on the center point you marked in the previous step. The lock cylinder is the part that holds the key and will be visible on the exterior side of the door.

: Mark the Mounting Holes

Mark the locations for the mounting holes of the lock cylinder. Typically, there are two mounting screws that secure the lock cylinder in place. Use a pencil to mark the spots where the screws will go.

: Drill Pilot Holes

Using a power drill, drill pilot holes at the marked locations for the mounting screws. Make sure the pilot holes are slightly smaller than the screws to ensure a secure fit.

: Install the Lock Cylinder

Place the lock cylinder in position, aligning it with the pilot holes. Secure the lock cylinder by tightening the mounting screws using a screwdriver or a power drill.

: Insert the Latch Mechanism

The latch mechanism is the part that extends into the garage door track to secure the door. Insert the latch mechanism into the corresponding hole on the garage door, making sure it aligns with the lock cylinder.

: Secure the Latch Mechanism

Secure the latch mechanism in place by tightening the screws with a screwdriver or power drill. Ensure that the latch moves freely in and out when the key is turned.

: Test the Lock Set

Insert the key into the lock cylinder and turn it to test the lock set. The latch should extend into the garage door track, preventing the door from being opened. Turn the key in the opposite direction to retract the latch and open the door.

: Check Alignment

Ensure that the lock set is aligned properly. The key should turn smoothly, and the latch should engage and disengage without any resistance.

: Lubricate Moving Parts (Optional)

If necessary, apply lubricant to the moving parts of the lock set, including the lock cylinder and latch mechanism. This helps ensure smooth operation and longevity.

: Duplicate Keys (Optional)

Consider duplicating the keys for your garage door lock set. This can be useful in case of lost keys or if you want to provide access to multiple individuals.

: Final Inspection

Perform a final inspection of the lock set installation. Check for any loose screws, misalignment, or issues with the key turning. Make any necessary adjustments to ensure proper functionality.

By following these detailed steps, you can successfully install a Garage Door Repair Miami FL. Always refer to the specific instructions provided by Clopay and exercise caution when working with tools and drilling holes in your garage door. If you encounter difficulties or have concerns, it’s advisable to seek professional assistance for the installation.

All American Doors

8155 NW 93rd St, Medley, FL 33166, United States

1-305-885-8088

Page 2 of 3

Powered by WordPress & Theme by Anders Norén