Tag: Garage Door

How Much Is A Motor For A Garage Door – A 24 Hour Door Service

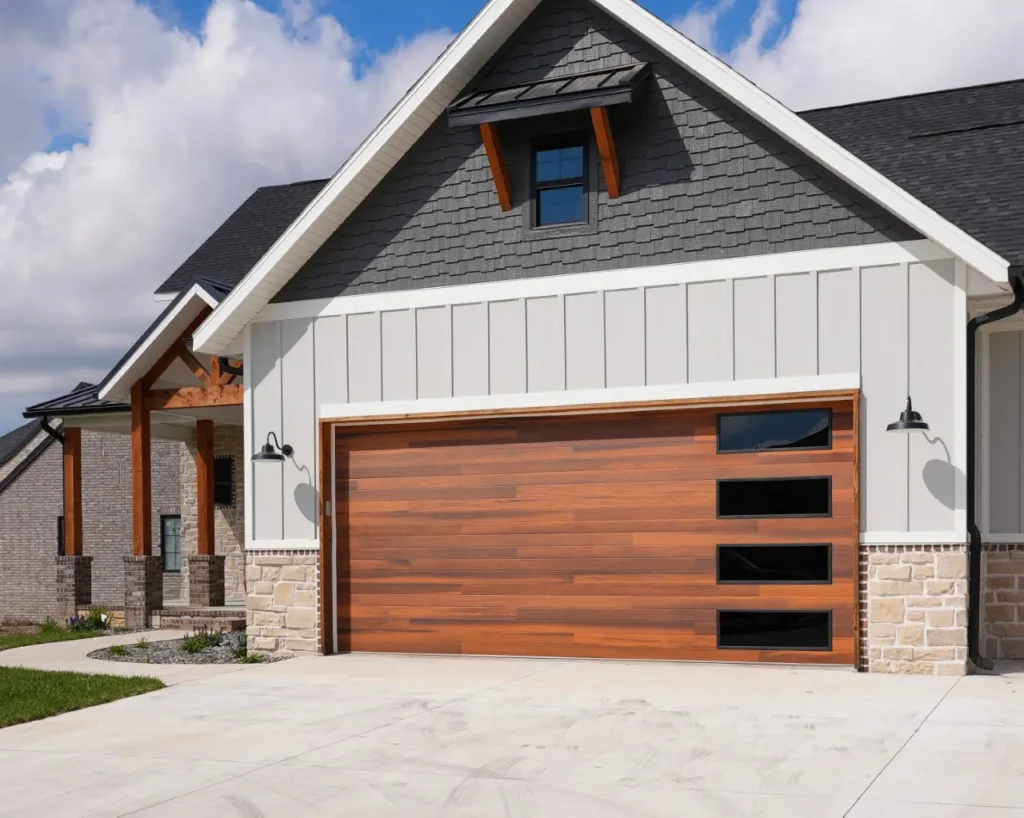
The Garage Door Repair Madison MS is the powerhouse behind the seamless operation of your garage door. As a critical component, understanding the factors influencing the cost of a garage door opener motor is essential for homeowners looking to maintain or upgrade their garage door systems.

In this comprehensive guide, we will delve into the various aspects that contribute to the pricing of garage door opener motors, providing valuable insights for making informed decisions.

The Significance of a Reliable Garage Door Opener Motor

A garage door opener motor is responsible for lifting and lowering the garage door efficiently. Its reliability directly impacts the overall functionality and security of your garage. Exploring the costs associated with these motors is a fundamental step in ensuring the longevity and optimal performance of your garage door system.

Factors Influencing Garage Door Opener Motor Costs

Horsepower Rating

The horsepower rating of a garage door opener motor is a key determinant of its cost. Motors with higher horsepower ratings are capable of lifting heavier garage doors and may come with a higher price tag. Understanding your garage door’s weight and size helps in selecting the appropriate horsepower.

Type of Drive System

Garage door opener motors come with different drive systems, including chain, belt, and screw drives. Each drive type has its characteristics, and the choice can influence the motor’s cost. Chain drives are often more budget-friendly, while belt drives are known for their quiet operation and may cost slightly more.

Smart Technology Integration

The integration of smart technology features into garage door opener motors is becoming increasingly popular. Motors with smart capabilities, such as remote control via smartphone apps or compatibility with home automation systems, may have a higher cost due to their advanced functionalities.

Brand Reputation

The reputation of the brand manufacturing the garage door opener motor can impact its cost. Established and reputable brands may have higher prices due to their track record of reliability and quality. However, lesser-known brands may offer budget-friendly options.

Noise Levels

Garage door opener motors vary in noise levels during operation. Motors designed for quiet operation, often referred to as ultra-quiet or whisper-quiet models, may have a higher cost compared to traditional motors with more noise.

Comparative Analysis with Other Garage Door Components

Motor vs. Other Garage Door Parts

Comparing the costs of garage door opener motors with other essential components, such as springs, tracks, and sensors, provides homeowners with a holistic view of the overall investment required for garage door maintenance or upgrades.

Performance and Durability

Analyzing the performance and durability of different garage door opener motors helps homeowners assess their long-term value. Motors known for reliability and extended lifespan may justify a higher initial cost.

Cost Range for Garage Door Opener Motors

Standard Horsepower Motors

Standard horsepower motors, suitable for average-sized garage doors, are often more budget-friendly. These motors provide reliable performance for typical residential needs.

High Horsepower Motors

Garage doors with larger or heavier panels may require high horsepower motors for efficient operation. High horsepower motors are more robust and durable but may come with a higher price point.

Smart Technology Motors

For homeowners seeking the convenience of smart technology integration, garage door opener motors with advanced features may be a worthwhile investment. The added cost reflects the benefits of remote control and smart home compatibility.

Installation Costs and Considerations

DIY vs. Professional Installation

Homeowners can choose between a do-it-yourself installation and professional services. While DIY may save on labor costs, professional installation ensures precision and adherence to safety standards, which may add to the overall expense.

Hiring Certified Installers

When opting for professional installation, hiring certified technicians familiar with garage door opener motors is crucial. Proper installation minimizes the risk of malfunctions and ensures optimal performance.

Warranty and Maintenance

Understanding Warranty Policies

The warranty offered with a garage door opener motor can influence its cost. Motors with extended warranty periods or comprehensive coverage may have a higher upfront price but provide added peace of mind.

Routine Maintenance Tips

Regular maintenance is essential for prolonging the lifespan of the garage door opener motor. Homeowners can perform simple tasks such as lubrication and visual inspections to ensure smooth operation.

Customer Satisfaction and Reviews

Online Customer Feedback

Exploring online platforms for customer feedback and reviews provides insights into the experiences of other homeowners with specific garage door opener motors. Positive reviews highlight reliability, while negative feedback may signal potential concerns.

Common Positive and Negative Comments

Identifying common positive and negative comments about various garage door opener motors assists in making an informed decision. Look for recurring themes related to durability, ease of use, and noise levels.

Tips for Making an Informed Purchase Decision

Assessing Garage Door Specifications

Understanding the weight, size, and type of your garage door helps in selecting a motor with the appropriate horsepower and drive system. This ensures optimal performance and longevity.

Budget Considerations

Set a budget for the garage door opener motor installation, considering not only the upfront cost but also potential long-term savings. Investing in a reliable and durable motor can lead to fewer repairs and replacements in the future.

Seeking Professional Advice

When uncertain, consult with professionals in the garage door industry. Certified technicians and specialists can provide guidance based on your specific garage door specifications and budget.

Conclusion:

In conclusion, the cost of a Garage Door Repair Madison MS is influenced by various factors, including horsepower rating, drive system, smart technology integration, brand reputation, and noise levels. By understanding these factors and conducting a comparative analysis with other garage door components, homeowners can make informed decisions that align with their preferences and budget.

A 24 Hour Door Service

417 Post Oak Cove, Madison, MS 39110, United States

1-601-664-8935

How To Install Garage Door Opener – 8565 S Eastern Ave #150


Installing a Garage Door Repair Las Vegas NV is a moderately challenging but rewarding DIY project that enhances the convenience and security of your garage.

Before you begin, ensure you have the necessary tools, read the manufacturer’s instructions thoroughly, and follow safety guidelines. Here’s a comprehensive step-by-step guide on how to install a garage door opener:

1. Gather Tools and Materials:

  • Collect the tools and materials needed for the installation, including a power drill, wrenches, screwdrivers, a ladder, and the components provided with the garage door opener kit.

2. Pre-Installation Checklist:

  • Confirm that your garage door is in good working condition and balanced. The door should move smoothly along its tracks without any binding. If there are issues with the door, address them before installing the opener.

3. Assemble the Opener Components:

  • Unbox the garage door opener and assemble the components according to the manufacturer’s instructions. This typically involves attaching the rail sections, motor unit, and other hardware.

4. Install the Rail and Trolley:

  • Position the rail along the ceiling of the garage, securing it with provided brackets. Attach the trolley to the rail and the motor unit, ensuring it can move freely.

5. Mount the Motor Unit:

  • Securely mount the motor unit to the ceiling, following the manufacturer’s guidelines. Use the provided straps or angle iron for stability.

6. Attach the Trolley to the Door:

  • Connect the trolley to the garage door by attaching the provided arm to the top section of the door. This arm is often referred to as the “straight arm” and connects to the trolley carriage.

7. Adjust the Chain or Belt:

  • If your garage door opener uses a chain or belt drive, adjust the tension according to the manufacturer’s instructions. The chain or belt should have just enough tension to prevent sagging.

8. Install the Emergency Release Rope:

  • Attach the emergency release rope to the carriage. This allows you to manually open and close the garage door in case of a power outage.

9. Connect the Power:

  • Connect the power cord to the motor unit and plug it into a power outlet. If the opener has a hardwired connection, follow the wiring instructions.

10. Program the Remote Control: – Follow the manufacturer’s instructions to program the remote control(s) that came with the opener. This usually involves setting a unique code for security.

11. Install the Wall Console: – Mount the wall console inside the garage, ensuring it is within reach but out of the reach of children. Connect the wall console to the motor unit according to the provided instructions.

12. Adjust the Travel Limits: – Adjust the travel limits to determine how far the door should open and close. Refer to the manufacturer’s manual for specific instructions on adjusting the limits.

13. Set the Force Settings: – Adjust the force settings to ensure that the opener stops and reverses if it encounters an obstruction. This helps prevent damage to the door and enhances safety.

14. Install Safety Sensors: – Mount the safety sensors on each side of the garage door, approximately 6 inches above the floor. Align the sensors so that they face each other. These sensors prevent the door from closing if an object or person is in the way.

15. Secure the Opener to the Ceiling: – Double-check that all components are securely mounted and tighten any loose screws or bolts. The opener should be stable and vibration-free.

16. Test the Door: – Test the garage door’s operation by using the remote control and wall console. Check for smooth movement, and ensure the door stops and reverses as expected.

17. Adjustments and Fine-Tuning: – Make any necessary adjustments to ensure the door operates smoothly. This may include tweaking the force settings, travel limits, and ensuring the door is balanced.

18. Final Inspection: – Conduct a final inspection of the entire installation. Check for proper alignment, secure mounting, and functional safety features.

19. Professional Assistance (if needed): – If you encounter difficulties or are unsure about any aspect of the installation, it’s advisable to seek professional assistance. Garage door opener installations may vary, and professionals can provide expertise to ensure a safe and efficient setup.

20. User Manual and Maintenance: – Keep the user manual in a readily accessible location for future reference. Perform regular maintenance, such as lubricating moving parts, to prolong the life of the garage door opener.

Remember, while installing a Garage Door Repair Las Vegas NV is a manageable DIY project, safety is paramount. If at any point you feel uncomfortable or encounter difficulties, don’t hesitate to seek professional help to ensure a secure and effective installation.

8565 S Eastern Ave #150

8565 S Eastern Ave, Las Vegas, NV 89123

702-343-2252

How To Reattach Garage Door Chain – Camco Commercial Door Company

Reattaching a Garage Door Repair Knoxville TN chain involves reconnecting the chain to the garage door opener’s trolley carriage.

This task is essential if the chain has become disconnected, preventing the garage door from opening or closing. In this comprehensive guide, I’ll walk you through the step-by-step process of reattaching a garage door chain.

1. Gather Necessary Tools: Before you start, gather the necessary tools, which typically include a ladder, a pair of pliers, and a wrench. Ensure that the ladder is stable and positioned on a flat surface.

2. Disconnect Power to the Garage Door Opener: For safety, disconnect power to the garage door opener. This can usually be done by unplugging the power cord from the electrical outlet or turning off the circuit breaker that supplies power to the opener.

3. Locate the Trolley Carriage: The trolley carriage is the part of the garage door opener that moves along the rail and connects to the garage door. It has a slot or opening where the chain needs to be reattached.

4. Position the Ladder: Place the ladder securely under the garage door opener so that you can access the trolley carriage comfortably. Ensure that the ladder is stable and positioned on a flat surface.

5. Inspect the Chain and Trolley Carriage: Before reattaching the chain, inspect it for any damage or signs of wear. Check the trolley carriage to ensure that it is in good condition and that the slot or opening for the chain is clear.

6. Align the Chain with the Trolley Carriage: Position yourself on the ladder so that you can easily access the trolley carriage. Hold the chain and align it with the slot or opening in the trolley carriage.

7. Insert the Chain into the Trolley Carriage: Once aligned, insert the chain into the slot or opening of the trolley carriage. Ensure that the chain is securely seated, and the links are engaged with any retention mechanism in place.

8. Use Pliers to Secure the Master Link (if applicable): Some garage door chains use a master link to connect the ends of the chain. If your chain has a master link, use pliers to secure the master link by closing it properly. Ensure that the master link is fully closed and secured.

9. Tighten the Chain (if needed): Check the tension of the chain. It should be taut but not overly tight. Use a wrench to adjust the tension if necessary. Many garage door openers have an adjustment mechanism on the trolley carriage or on the rail.

10. Test the Garage Door: Once the chain is reattached and the tension is adjusted, test the garage door by manually lifting and lowering it. Ensure that the door moves smoothly without any unusual noises or resistance.

11. Reconnect Power to the Garage Door Opener: After confirming that the garage door operates correctly, reconnect power to the garage door opener. Plug in the power cord or turn on the circuit breaker.

12. Test the Automatic Operation: Test the automatic operation of the garage door opener by using the remote control or wall button. Ensure that the door opens and closes smoothly without any issues.

13. Regular Maintenance: Periodically inspect the garage door chain for signs of wear or damage. Lubricate the chain as recommended by the manufacturer to ensure smooth operation.

14. Professional Assistance (if needed): If you encounter difficulties during the reattachment process or if the garage door chain continues to have issues, consider seeking professional assistance from a certified technician. They can inspect the garage door opener and chain, identify any underlying issues, and provide expert solutions.

By following these detailed steps, you can successfully reattach a Garage Door Repair Knoxville TN chain, restoring the functionality of your garage door opener. Always prioritize safety and follow the manufacturer’s guidelines for maintenance and adjustments.

Camco Commercial Door Company

853 East Wolf Valley Rd. Heiskell, TN 37754

1-502-203-7878

How To Change Linear Garage Door Code – Dallas-Fort Worth Metropolitan Area

Changing the code on your Linear Garage Door Repair Fort Worth TX is a fundamental step in maintaining the security of your home.

In this comprehensive guide, we’ll walk through the process in detail, ensuring that you can successfully update the access code for your garage door.

1. Locate the Control Panel: Begin by finding the control panel on your Linear garage door opener. This panel is typically situated on the back or side of the motor unit and is often covered by a protective casing. Open the cover to reveal the control panel.

2. Identify the Learn Button or Switch: Look for the “Learn” button or switch on the control panel. The appearance of the Learn button can vary between models, but it’s generally labeled as such. This button is pivotal for initiating the process of changing the access code.

3. Clear Existing Codes (if necessary): Before setting a new code, it’s essential to clear any existing codes stored in the garage door opener’s memory. To do this, press and hold the “Learn” button until the indicator light on the opener blinks. This signals that the existing codes have been successfully cleared.

4. Choose a New Code: Select a new security code for your Linear garage door opener. Linear models commonly use a 4-digit PIN for simplicity. Choose a code that is easy for you to remember but not easily guessable to enhance the security of your garage.

5. Enter Programming Mode: Press the “Learn” button on the control panel to enter programming mode. The indicator light on the garage door opener should illuminate, indicating that the unit is ready to learn a new code.

6. Enter the New Code: Within a specified time frame (typically 30 seconds), enter your chosen 4-digit PIN using the keypad or remote control. Press each digit deliberately, allowing the garage door opener to recognize and store the new code. The indicator light should blink or turn off, confirming the successful entry of the new code.

7. Test the New Code: Ensure that the new code works by pressing the programmed button on the keypad or remote control. The garage door should respond by either opening or closing. If the door does not operate as expected, carefully review your steps and ensure accurate code entry.

8. Program Additional Devices (if applicable): If you have multiple devices or remotes, repeat the process for each one. It’s crucial to ensure that all devices are programmed with the same security code for consistent and convenient access.

9. Secure the Opener: After completing the programming process, secure the garage door opener by storing remote controls in a safe and easily accessible place. Keep the new code confidential to maintain the overall security of your garage.

10. Troubleshooting: If you encounter any issues during the programming process, consult the user manual that came with your Linear garage door opener for specific troubleshooting steps. Common problems might include interference from other electronic devices or an incorrect code entry.

11. Professional Assistance (if needed): If you find yourself uncertain about any step or encounter persistent issues, consider seeking professional assistance from a Linear-certified technician. Professional help ensures the proper configuration and functionality of your garage door opener.

By following these detailed steps, you can confidently change the code on your Linear Garage Door Repair Fort Worth TX, enhancing the security of your home with a new, personalized access code. Remember to always prioritize the confidentiality of your access code for optimal safety.

Dallas-Fort Worth Metropolitan Area

2129 Tippy Ter, Fort Worth, TX 76134

1-817-646-3237

How To Change Code On Garage Door Opener Chamberlain – All American Doors

Changing the code on your Chamberlain Garage Door Repair Miami FL is a straightforward process that involves a series of steps to ensure security and successful programming.

This comprehensive guide will walk you through each step in detail, providing a thorough understanding of the process.

1. Locate the Learn Button: Start by identifying the “Learn” or “Program” button on your Chamberlain garage door opener. This button is typically located on the motor unit near the antenna wire. The button’s color may vary, so take note of it as it could be relevant later in the process.

2. Clear Existing Codes (if necessary): Before setting a new code, it’s crucial to clear any existing codes from the garage door opener’s memory. Press and hold the “Learn” button until the indicator light on the opener turns off. This action erases any previously programmed codes, providing a clean slate for the new code.

3. Choose a New Code: Decide on a new security code for your garage door opener. Chamberlain models commonly use a 4-digit PIN. Select a code that is easy for you to remember but not easily guessable for enhanced security.

4. Press the Learn Button: With the existing codes cleared and your new code in mind, it’s time to enter programming mode. Press the “Learn” button on the garage door opener. The indicator light should turn on, signaling that the opener is ready to learn a new code.

5. Enter the New Code: Within 30 seconds of pressing the “Learn” button, enter your chosen 4-digit PIN using the keypad or remote control. Press each digit deliberately, allowing the opener to recognize the new code. Wait for the indicator light to blink or turn off, confirming the successful entry of the new code.

6. Test the New Code: To ensure the new code works seamlessly, test it by pressing the programmed button on the keypad or remote control. The garage door should respond by either opening or closing. If the door doesn’t operate as expected, double-check your steps and ensure accurate code entry.

7. Program Additional Devices (if applicable): If you have multiple devices or remotes, repeat the process for each one. Ensure all devices are programmed with the same security code for convenient and unified access.

8. Secure the Opener: Once programming is complete, secure the garage door opener by storing remote controls in a safe place. Keep the new code confidential to maintain the security of your garage.

9. Troubleshooting: If you encounter any issues during the programming process, consult your Chamberlain garage door opener manual for specific troubleshooting steps. Common problems may include interference from other electronic devices or incorrect code entry.

10. Professional Assistance (if needed): If you are uncertain about any step or encounter persistent issues, consider seeking professional assistance from a Chamberlain-certified technician. Professional help ensures proper configuration and functionality of your garage door opener.

By following these detailed steps, you can confidently change the code on your Chamberlain Garage Door Repair Miami FL, enhancing the security of your home with a new, personalized access code.

All American Doors

8155 NW 93rd St, Medley, FL 33166, United States

1-305-885-8088

How To Change Code On Chamberlain Garage Door – All American Doors

Changing the code on a Chamberlain Garage Door Repair Miami FL involves reprogramming the remote control or keypad associated with the opener.

Chamberlain is a popular brand that provides various models of garage door openers, and the specific steps may vary slightly based on the model you own. However, the general process remains consistent. Here’s a comprehensive guide on how to change the code on a Chamberlain garage door opener:

1. Identify Your Chamberlain Garage Door Opener Model:

  • Before you start, identify the specific model of your Chamberlain garage door opener. You can find this information on the motor unit or in the owner’s manual.

2. Gather Necessary Information:

  • Before changing the code, gather the following information:
    • Model number of your Chamberlain garage door opener
    • Brand and model of the remote control or keypad you are programming
    • Existing access code (if applicable)

3. Locate the “Learn” Button on the Garage Door Opener:

  • Most Chamberlain garage door openers have a “Learn” or “Program” button on the motor unit. This button is typically located on the back or side of the motor unit.

Programming a Chamberlain Garage Door Opener:

For Remote Controls:

4. Clear Existing Codes (Optional):

  • If you’re changing the code for security reasons, consider clearing existing codes from the remote control. This step is optional but ensures that only the newly programmed code is valid. Refer to the Chamberlain opener’s manual for instructions on clearing existing codes.

5. Access the Programming Mode:

  • Follow these general steps to access the programming mode on most Chamberlain garage door openers:
    • Press and release the “Learn” or “Program” button on the motor unit. The indicator light on the motor unit will typically begin flashing.

6. Press the Desired Button on the Remote Control:

  • While the indicator light on the motor unit is flashing, press the desired button on the remote control to program it. Hold the button until the indicator light on the motor unit stops flashing or turns solid.

7. Test the Remote Control:

  • Test the new code by pressing the programmed button on the remote control. The garage door should respond by opening or closing. If the door doesn’t operate as expected, repeat the programming process.

8. Repeat for Additional Remote Controls (If Applicable):

  • If you have multiple remote controls, repeat the programming process for each remote. Ensure that each remote is programmed within the specified time frame after pressing the “Learn” button on the garage door opener.

For Keypads:

9. Locate the Keypad:

  • If you have a wireless keypad installed outside the garage, locate it near the garage door. Keypads are usually mounted on the wall or on the door jamb.

10. Enter the Current Access Code: – Enter the current access code on the keypad. If you’re changing the code for security reasons and don’t know the current code, you may need to reset the keypad to factory settings.

11. Press the “Learn” Button on the Opener: – Press and release the “Learn” or “Program” button on the garage door opener motor unit. The indicator light on the motor unit will likely begin flashing, indicating that the opener is in programming mode.

12. Enter the New Access Code: – After pressing the “Learn” button, enter the new access code on the keypad. Make sure to enter the code within a specified time frame (usually 30 seconds) after pressing the “Learn” button.

13. Test the Keypad: – Test the keypad by entering the new access code and pressing the Enter or Send button. The garage door should respond accordingly. If not, repeat the programming process.

14. Open the MyQ App: – If your Chamberlain garage door opener is connected to a smart home system like MyQ, open the MyQ app on your smartphone or device.

15. Navigate to Access Code Settings: – Navigate to the access code or security settings within the app. This may vary depending on the smart home system you are using.

16. Change the Access Code: – Follow the on-screen instructions to change the access code. Some systems may require you to enter the current code before setting a new one.

17. Save Changes: – Save the changes within the app to apply the new access code to your garage door opener.

18. Test the New Code: – Test the new access code by using the app to open and close the garage door. Ensure that the updated code is working correctly.

Additional Tips and Considerations:

– Follow Model-Specific Instructions:

  • Consult the user manual for your specific Chamberlain garage door opener model for any model-specific instructions or features. The manual provides detailed information on programming and troubleshooting.

– Clearing Existing Codes:

  • If you want to ensure that previous codes are no longer valid, consider clearing all existing codes from the garage door opener. Follow the Chamberlain opener’s manual instructions for this process.

– Security Considerations:

  • Change your garage door access code periodically for enhanced security. Avoid using easily guessable codes, such as your address or birthdate.

– Battery Replacement:

  • If you encounter issues during programming or if the remote control becomes unresponsive, check and replace the battery. A weak or depleted battery can affect the remote’s performance.

– Repeat the Programming Process (If Needed):

  • If the programming is unsuccessful or if the new code doesn’t work, repeat the process carefully. Ensure that you follow the steps in the correct sequence and within the specified time frames.

Conclusion:

Changing the code on a Chamberlain Garage Door Repair Miami FL involves accessing the programming mode on both the remote control or keypad and the garage door opener motor unit. By following the steps outlined in this guide, you can successfully program a new access code for enhanced security. Remember to consult the specific user manual for your Chamberlain garage door opener model and your remote control or keypad for any model-specific instructions or features. Regularly updating access codes contributes to a secure and reliable garage door opener system.

All American Doors

8155 NW 93rd St, Medley, FL 33166, United States

1-305-885-8088

Page 3 of 3

Powered by WordPress & Theme by Anders Norén